Visualising
HTML5 - With widgets
To simplify visualisation of realtime data we have created a library called animera.js (http://github.com/op-en/animera.js). This library can via our appserver (http://github.com/op-en/appserver) connect realtime data from an MQTT server to different graphical properties on a website. The library can be used to develop your own visualisations however the easiest way to use it is to embed one of the existing visualisation widgets into your HTML5 based webpage or app.
Below you can see some examples of widgets. Click on the labels to view them in fullscreen.
In the case of the widgets you can control a number of values on them by changing parameters in their url. If the widget is placed on the op-en.se server for example the url might look like this:
In this case there are 4 parameters supplied to the widget.
max - the maximum value that the incomming data will have. This is used to scale the widget to fit the data range within its visual range.
topic - the topic that the widget will listen to inside MQTT. If you are sending your data to the op-en.se server on the topic test/mydata you need to set topic parameter to test/mydata in order for the widget to show your data.
subproperty - of the data arriving on the topic specified contains server different types of data e.g both power and an energy counter the subproperty can be used to specify if its the power or energy that should be shown.
decimals - specifies how many decimals that the value should be shown with.
Appart from these you can also use server to connect to another server then op--en.se or unit to change the unit shown in the widget.
Different widgets can of course have additional parameters.
Creating an app - With widgets and Evotings
Evothings is a mobile application development platform for internet of things. By downloading a development IDE (EvothingsWorkbench) to your computer and an app (Evothings viewer) to your phone it allows you to rapidly prototype mobile applications.
1) To get started begin by downloading both the IDE and the mobile phone app from Evothings webpage: https://evothings.com/download/
2) After this start EvothingsWorkbench and hit the Get Key button.
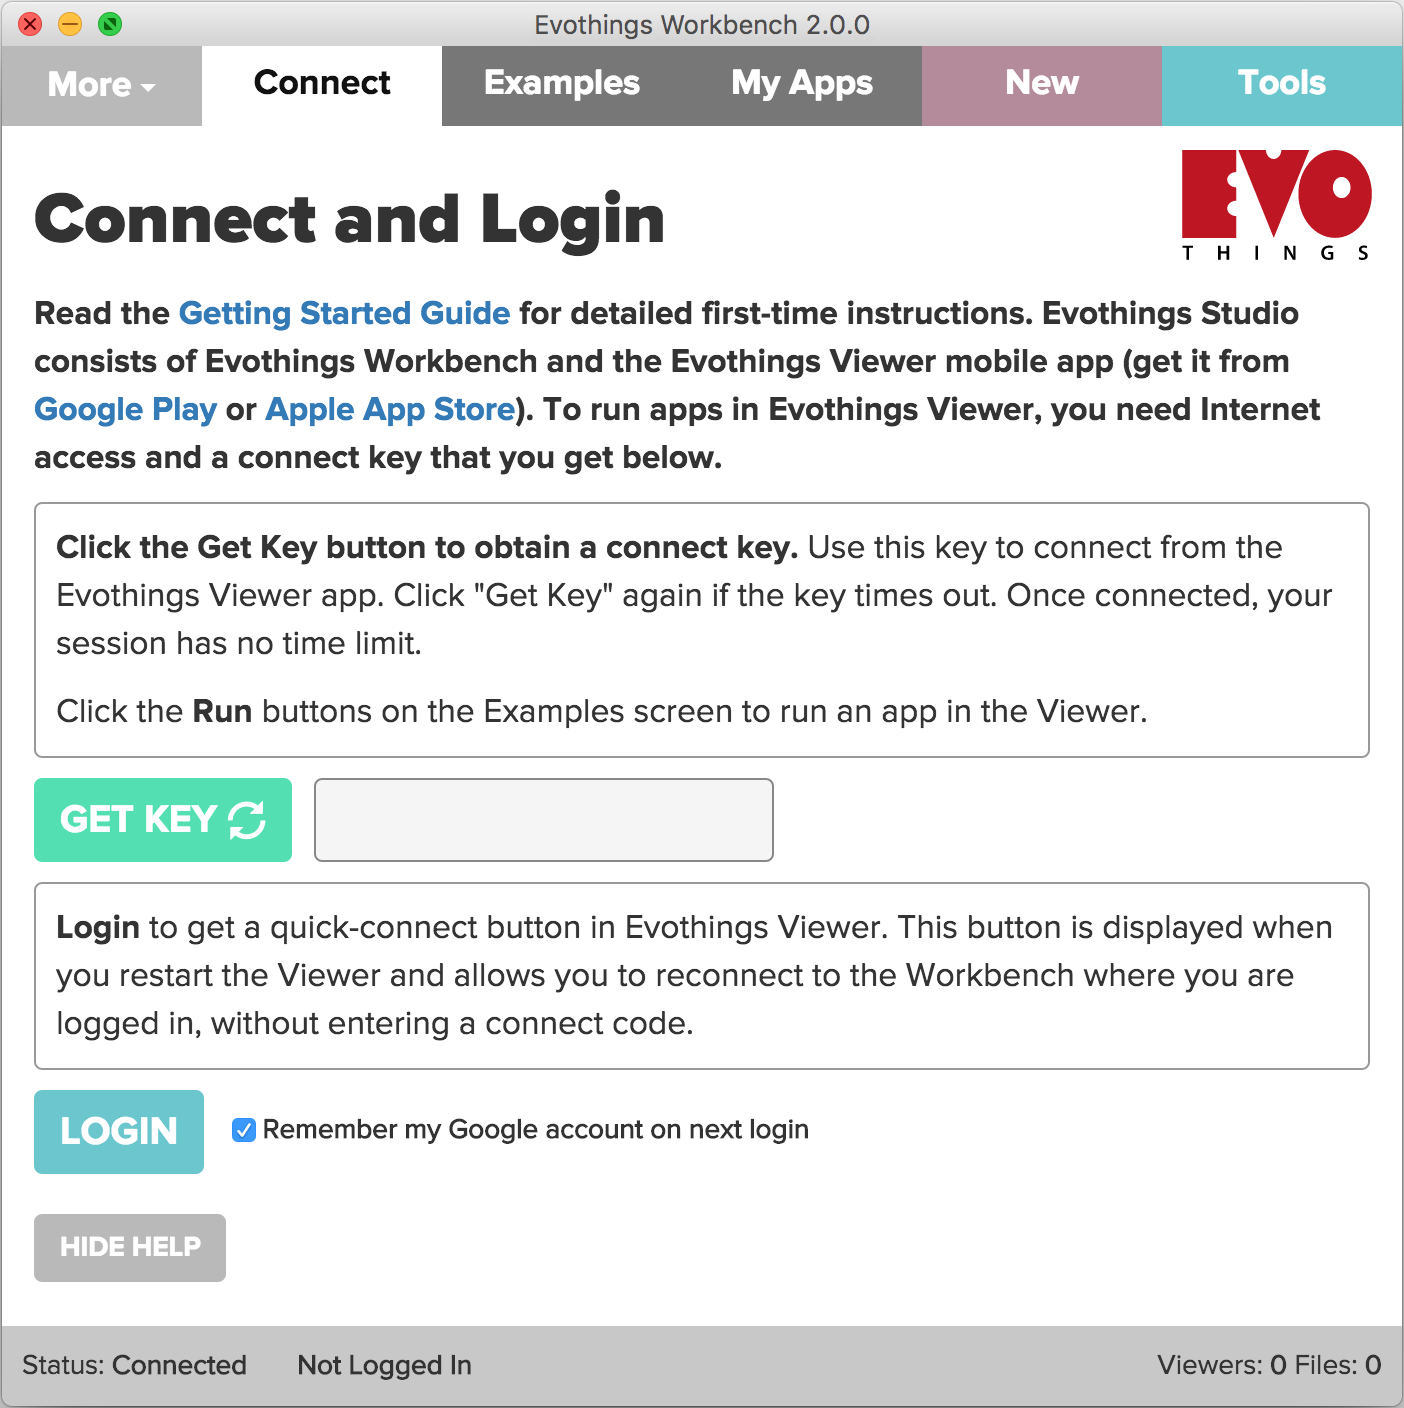
3) Now open the app on your phone and enter the key you just generated there. Once connected you can test it by clicking Examples in the EvotingsWorkbench and hit run on the "Hello World" example.
4) If everything is working you can now go to click on the new button to start a new creating your own application. Once you have filled in your application name and clicked create. It should appear under My Apps.
5) As a next step you can now press RUN. This will run your app which is still pretty much empty except for the default icon and TODO title from Evothings.
6) Then press the code button which will open the folder containing the files for your app. In the this folder open the index.html in your favourite text editor. If you don't have an text editor we suggest you download Atom
7) To add one of the above html widgets you need to download then into the folder of the application. Goto https://github.com/op-en/animera.js/releases and right click on widget-sharkdial.html and then "save link as". Save it in the folder of you app and replace the code
<h1>TODO: Add app title</h1>
<p>This is a basic template for an Evothings app.</p>
with
<object class="widget" data="widget-sharkdial.html?max=8000&topic=test/signalB&subproperty=power&decimals=0" style="height:120vmin; width:120vmin; margin-left:-16.3vmin; margin-top:17vmin;"></object>
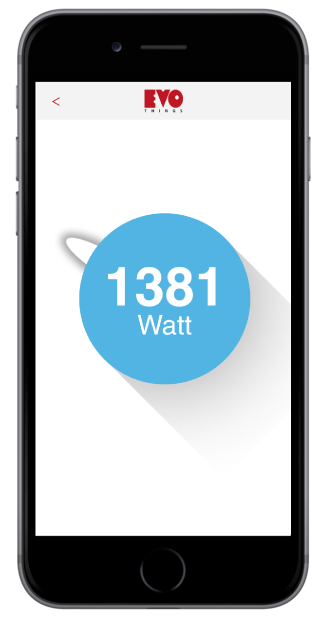 The result should now look like this. Change the style settings in the code you added to reposition or rescale the widget.
Also change the topic with currently is: test/signalB to the data source that you want to show. For example the topic your sensors if you did the one of the sensor tutorials or some data that you are generating with node-RED.
If you want to learn more of how to generate fake data on node-RED have a look at this tutorial.