Electric meter monitor Workshop (hardware)
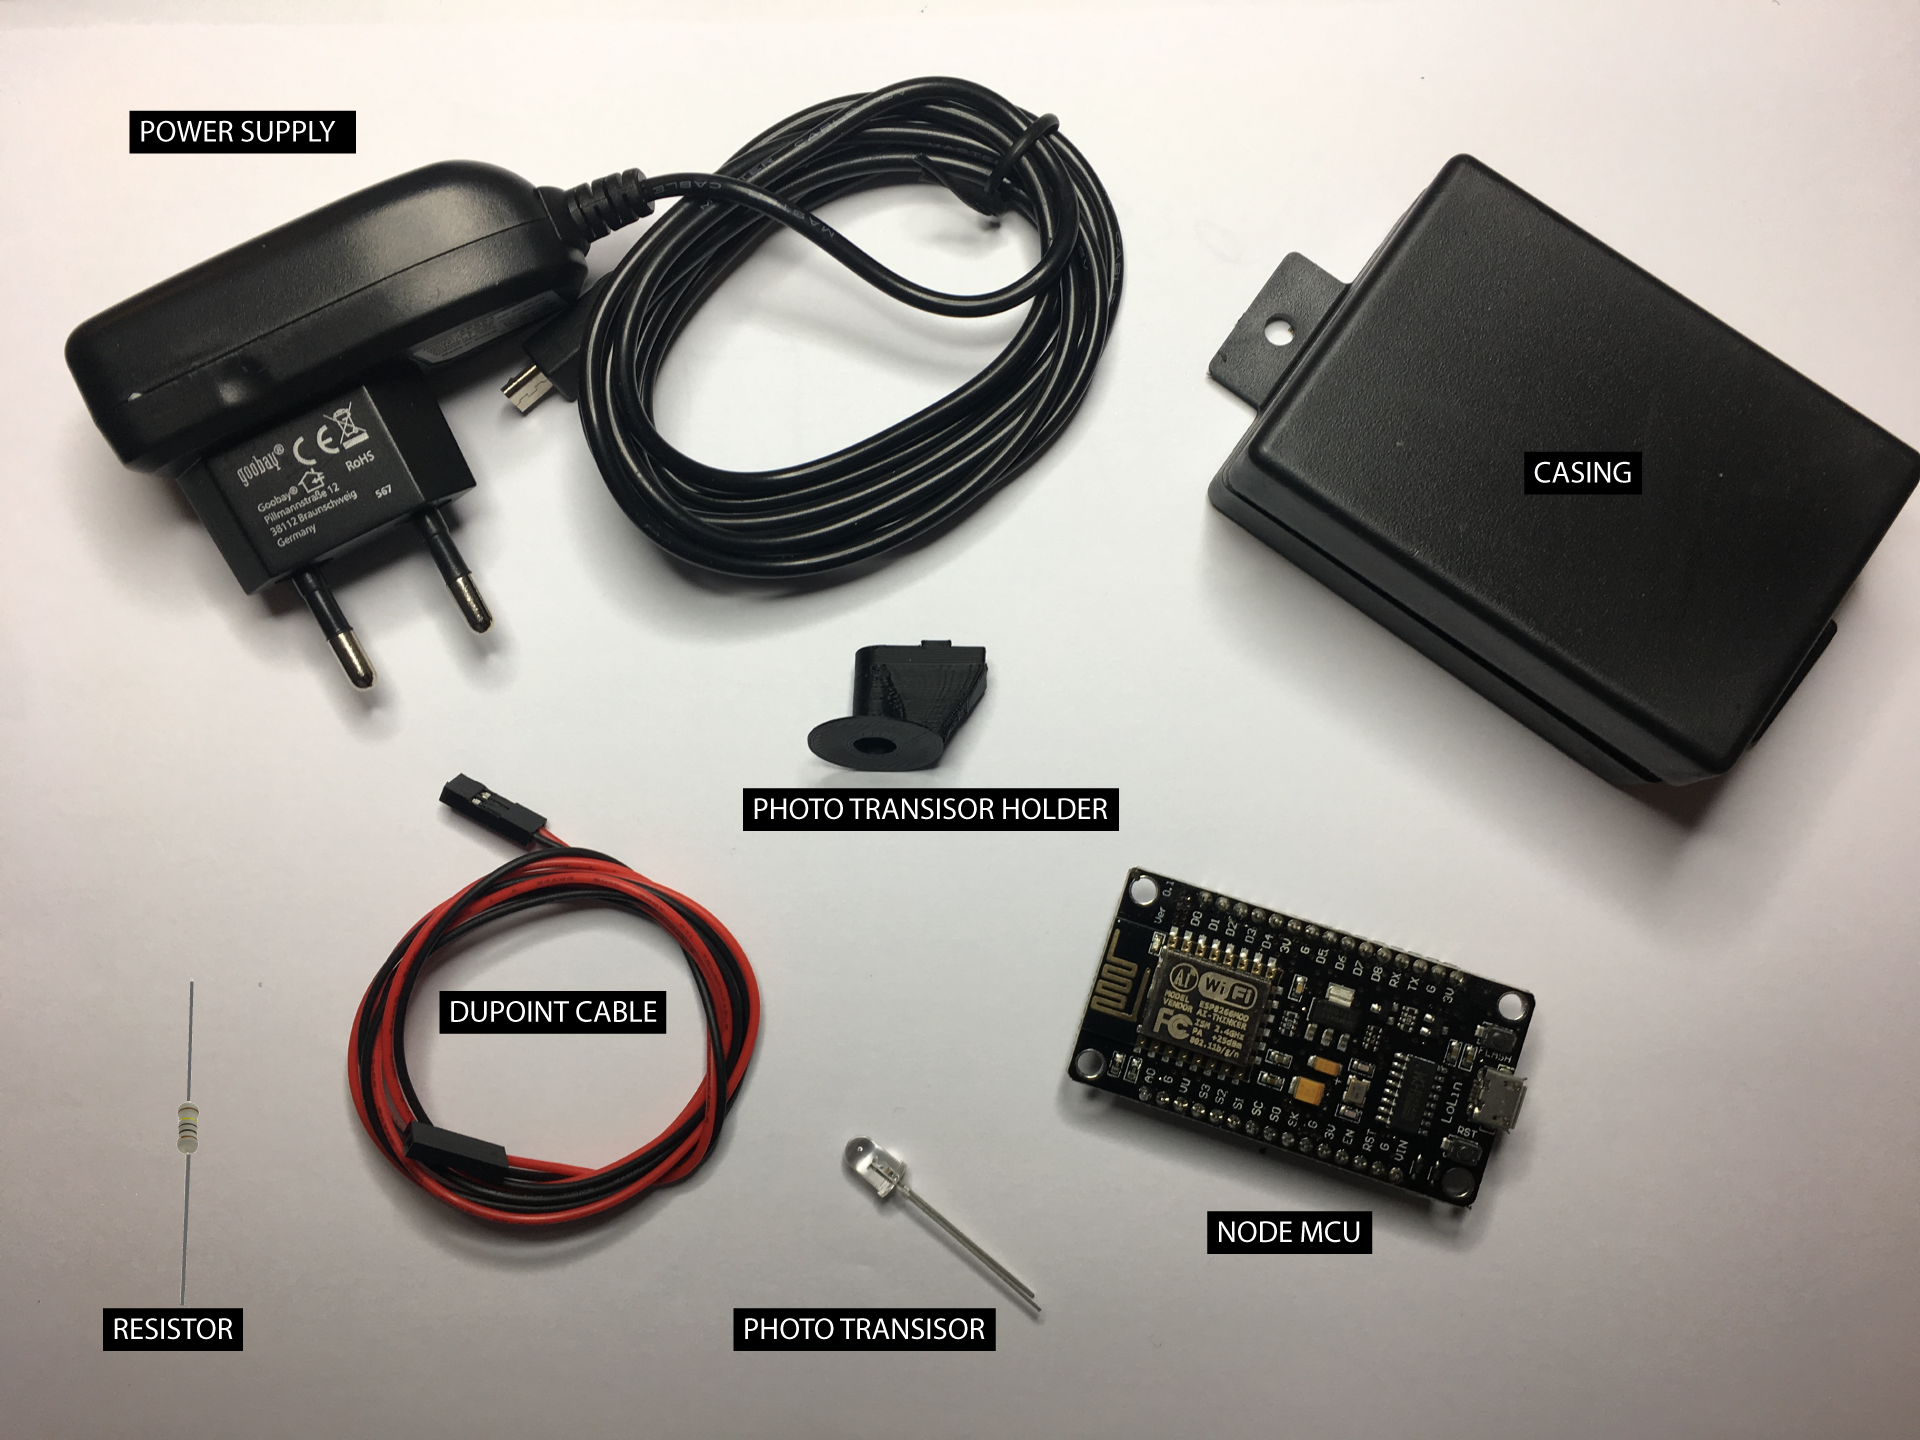 These are the parts that we will need to assemble to create the hardware for our energy monitor. Follow the description below and watch this video for a quick guide: https://youtu.be/4IkSjUP7SJo
1. Connecting the phototransistor
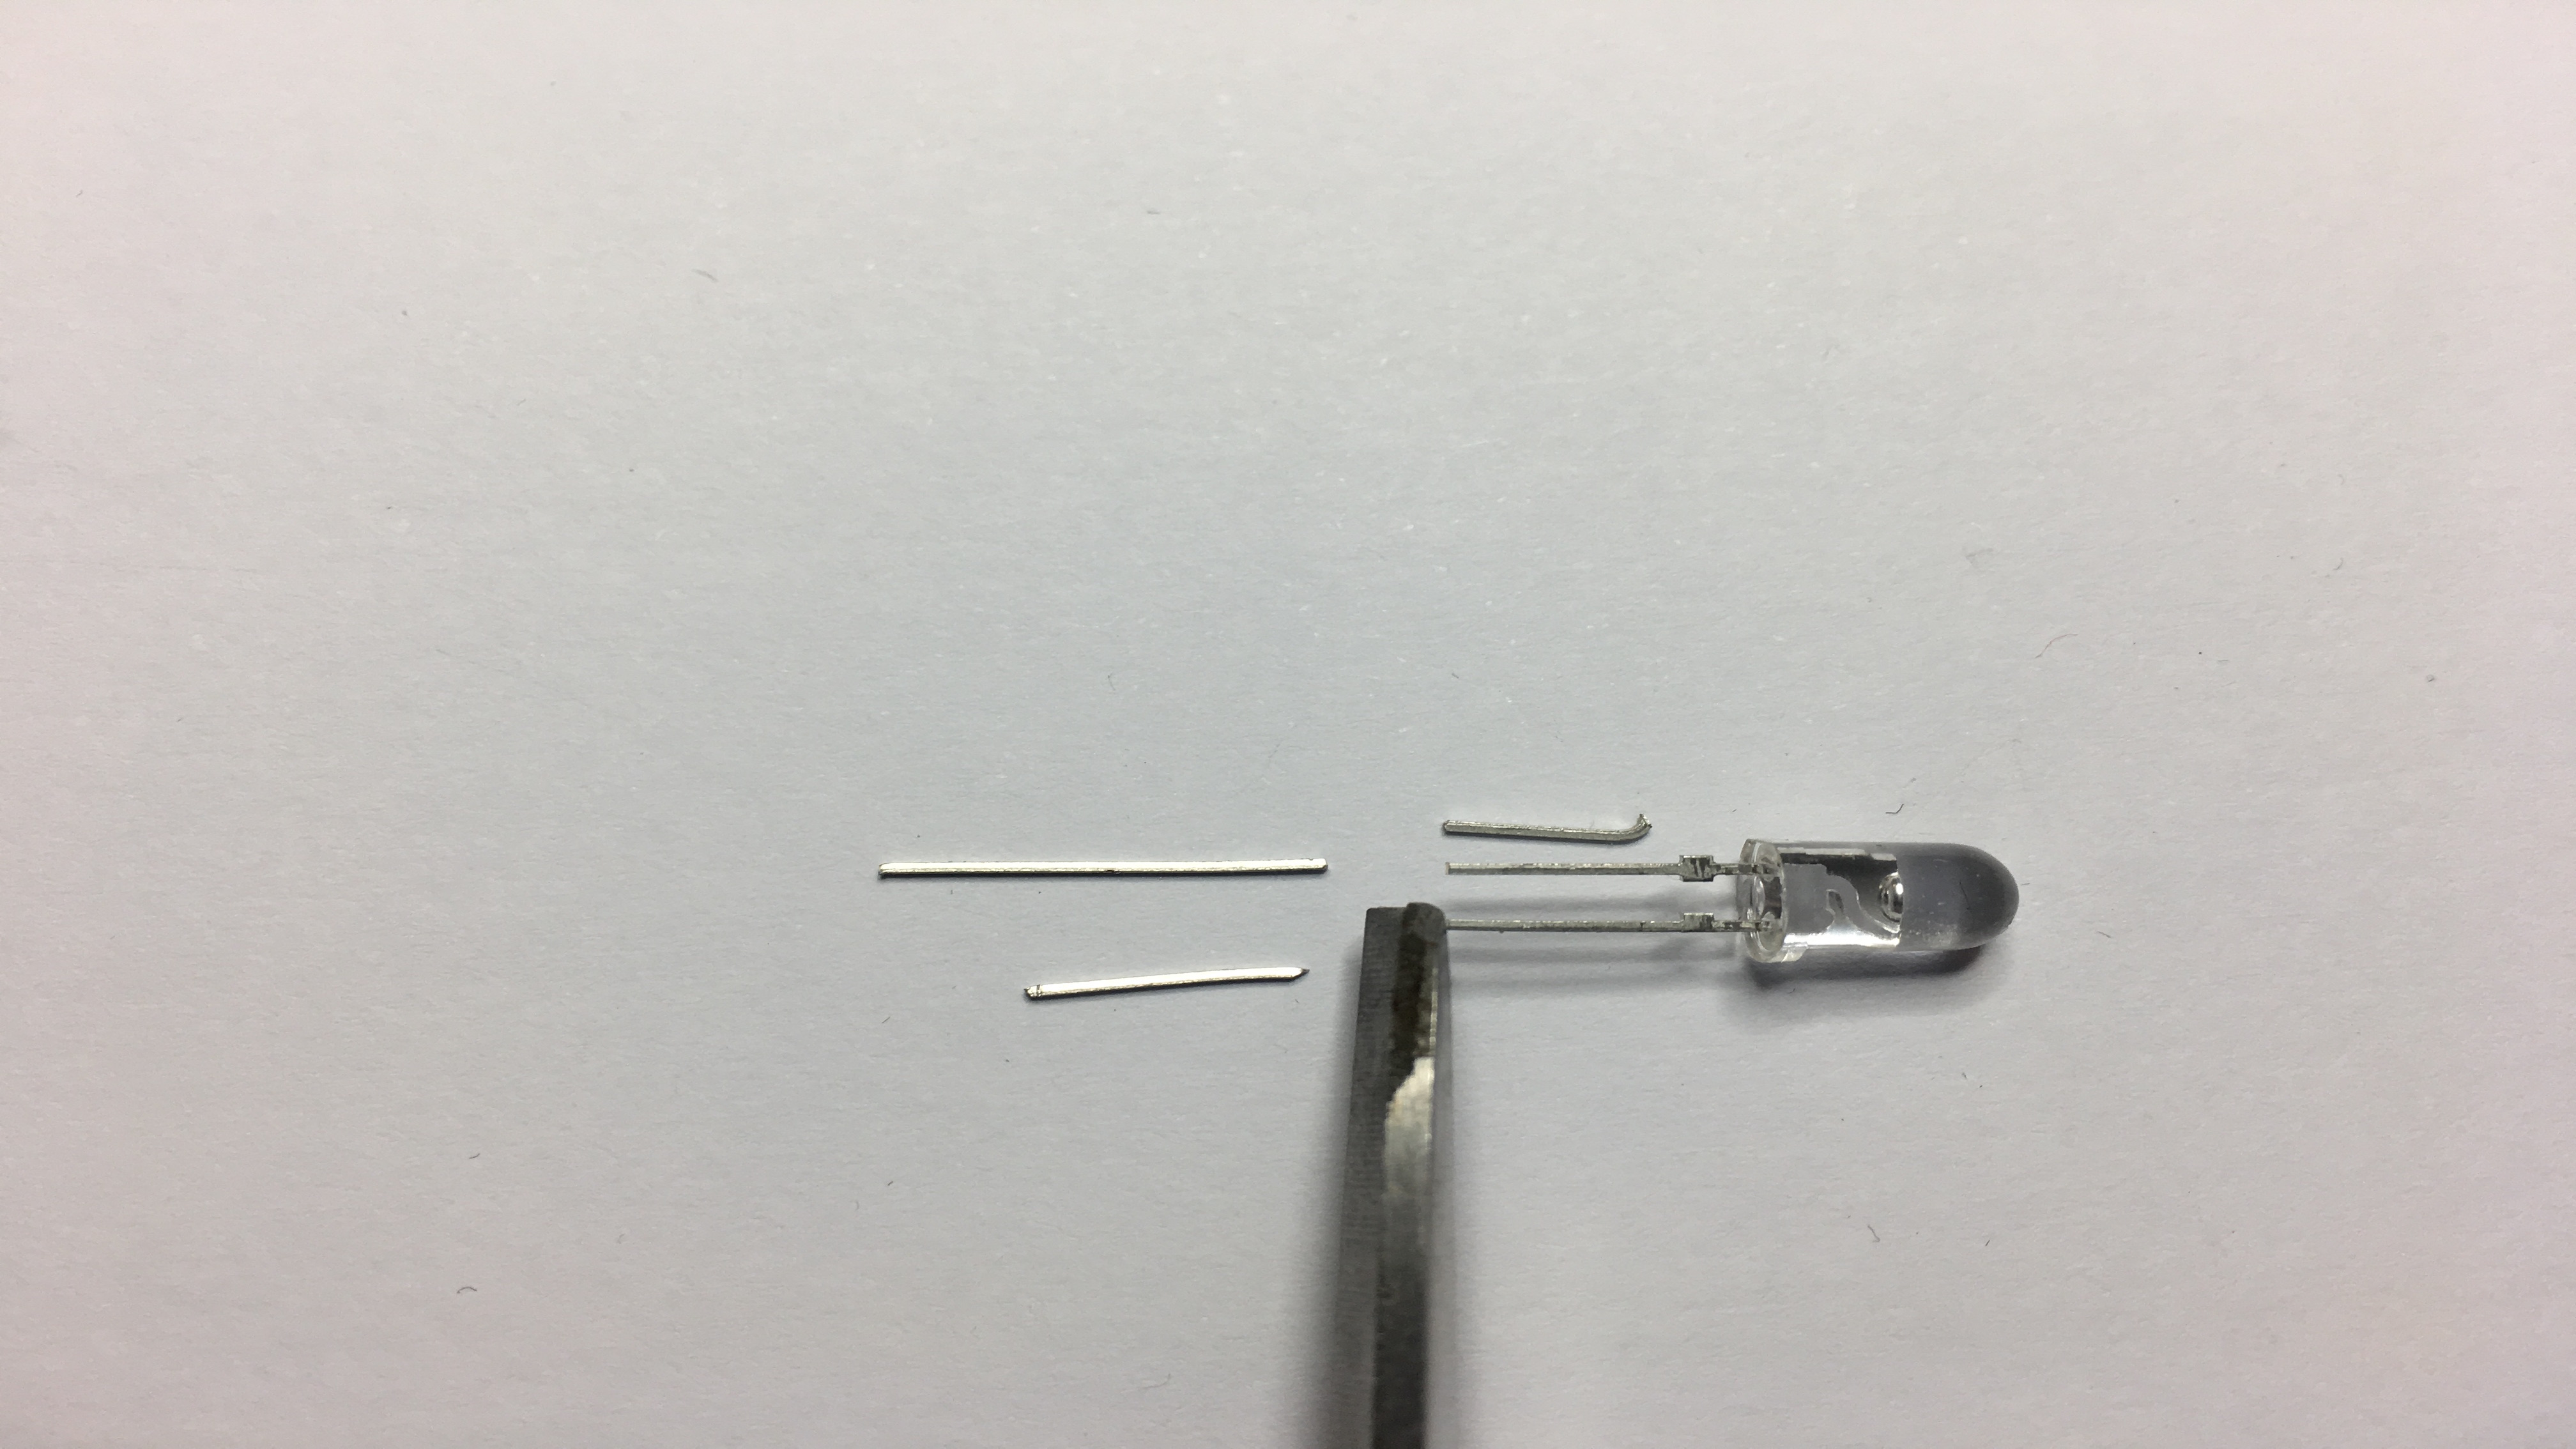 Begin with cutting the legs off from the phototransistor a bit.
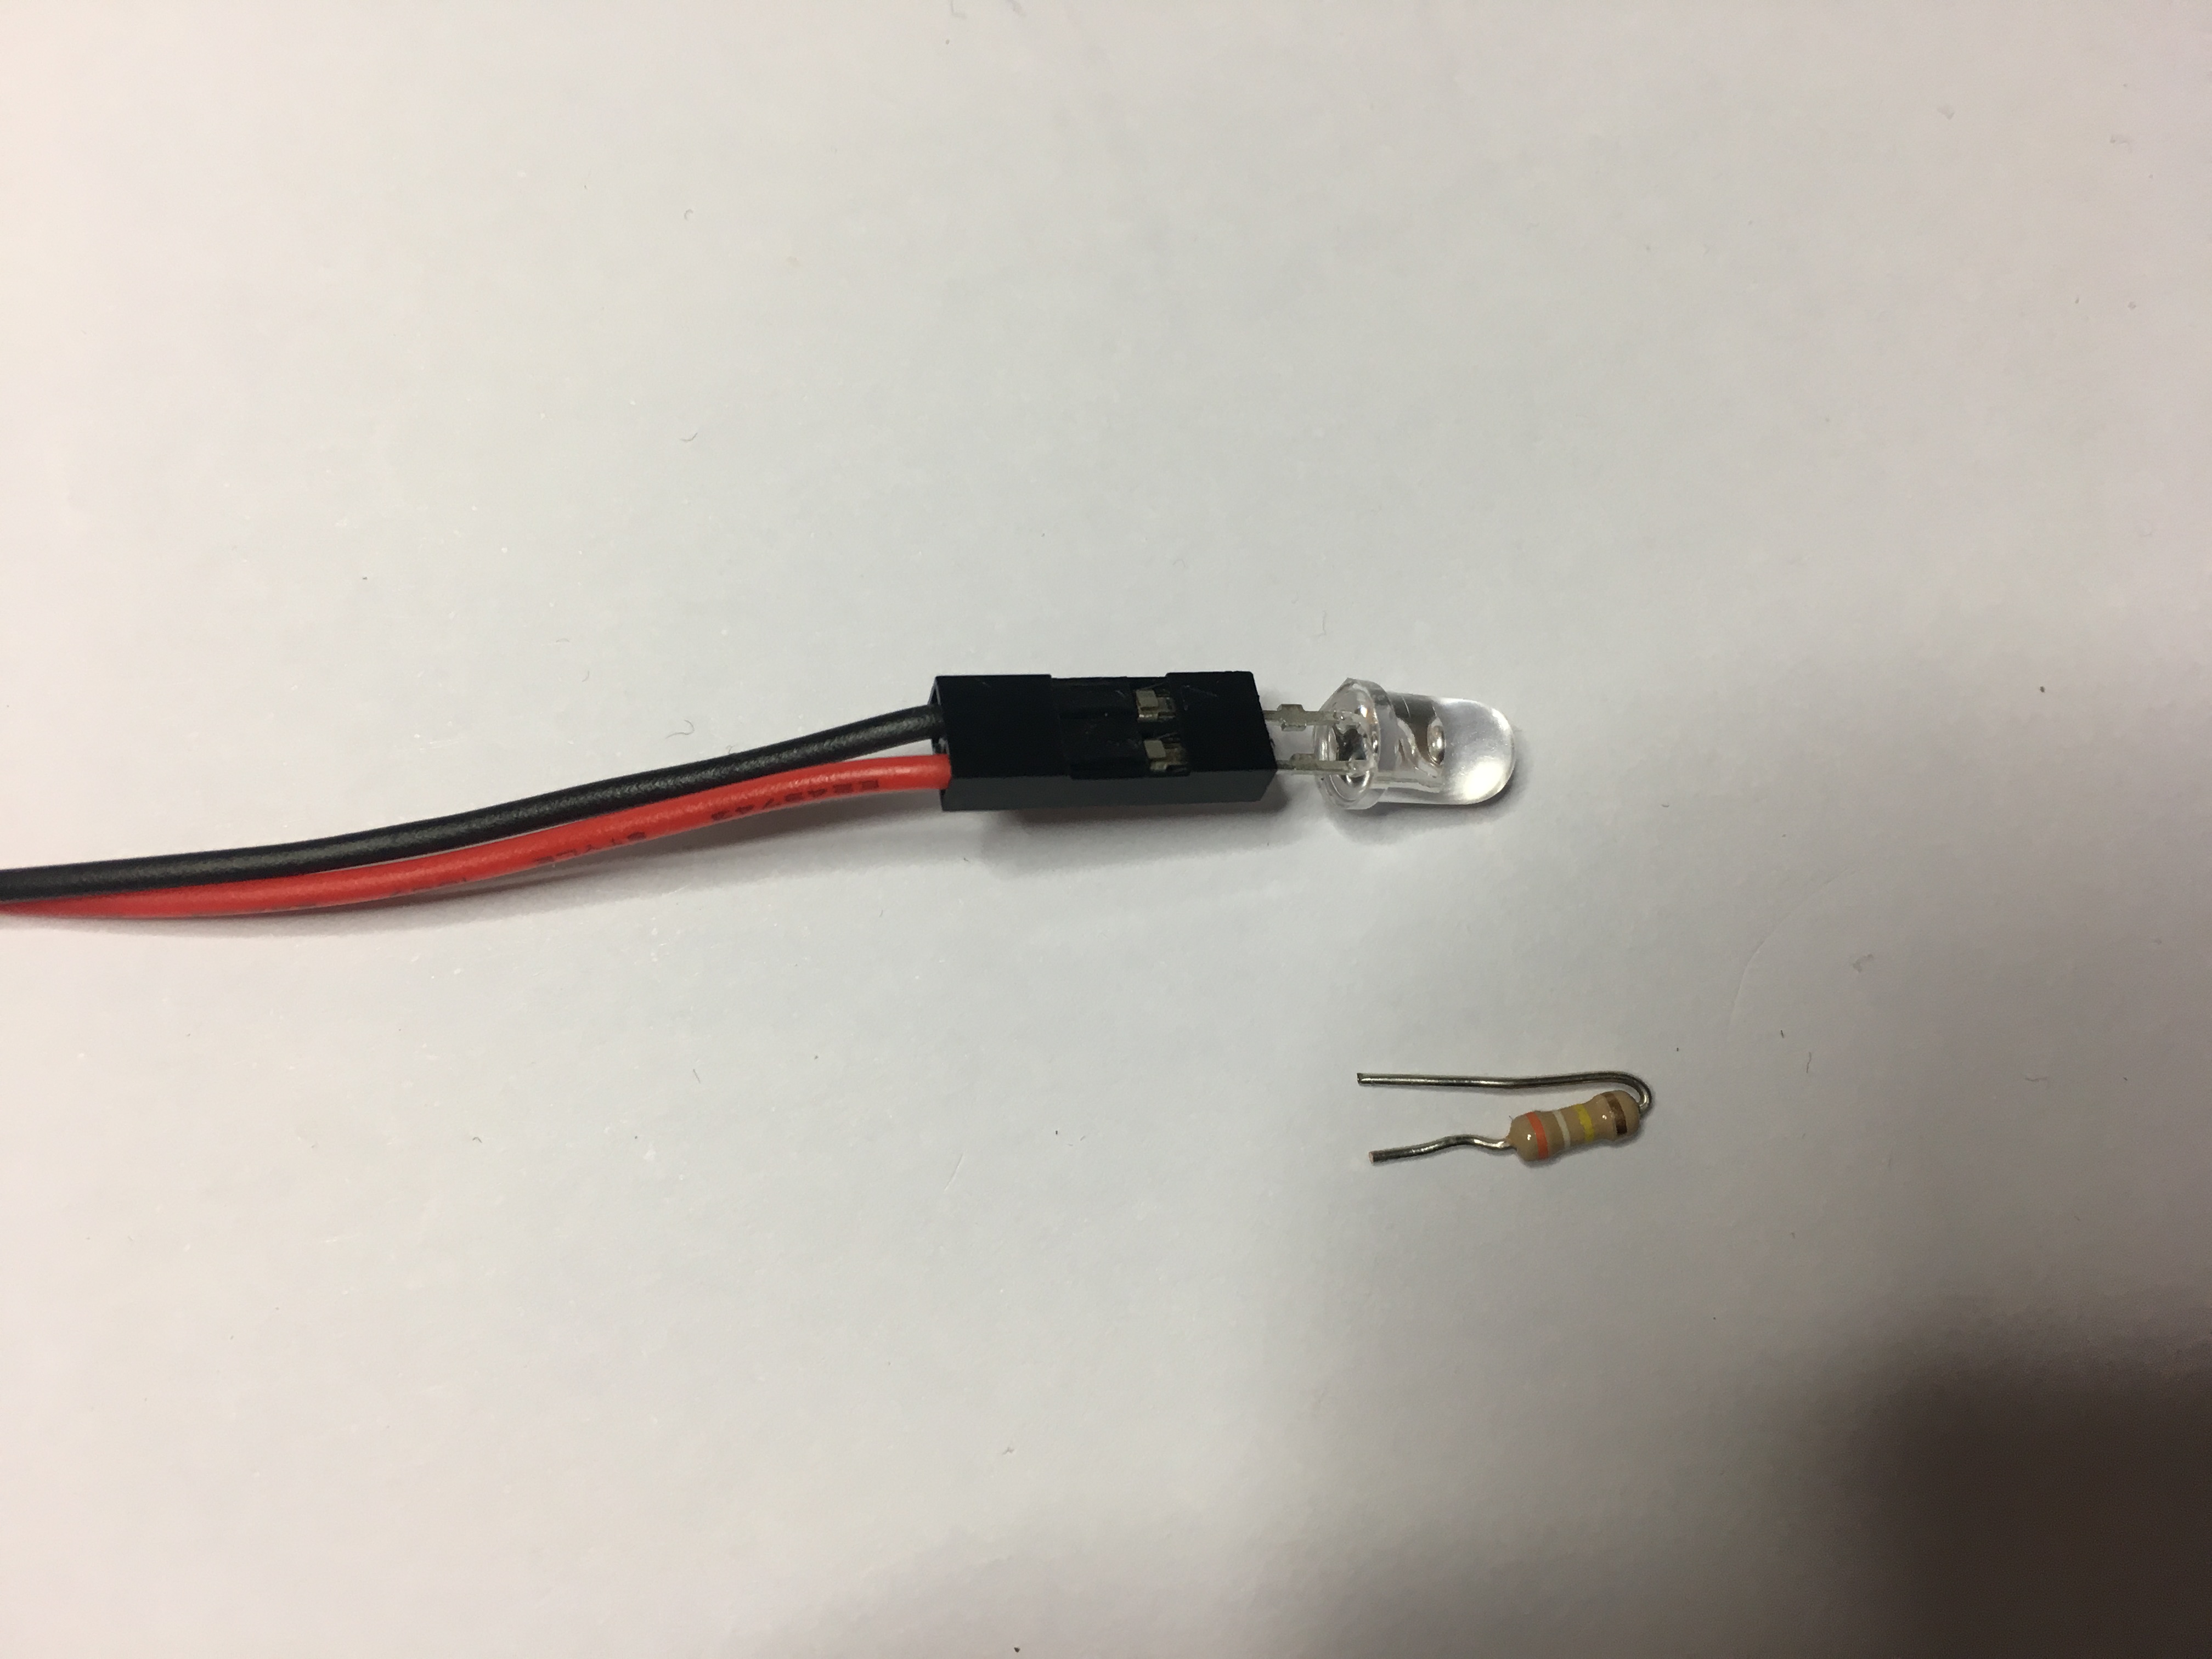 To increase the sensitivity of the phototransistor you might also have to add a resistor in parallel with it. In that case cut it as shown in the picture. The value of the resistor can be between 80-400kOhm. The smaller the resistance the more sensitive the phototransistor will be.
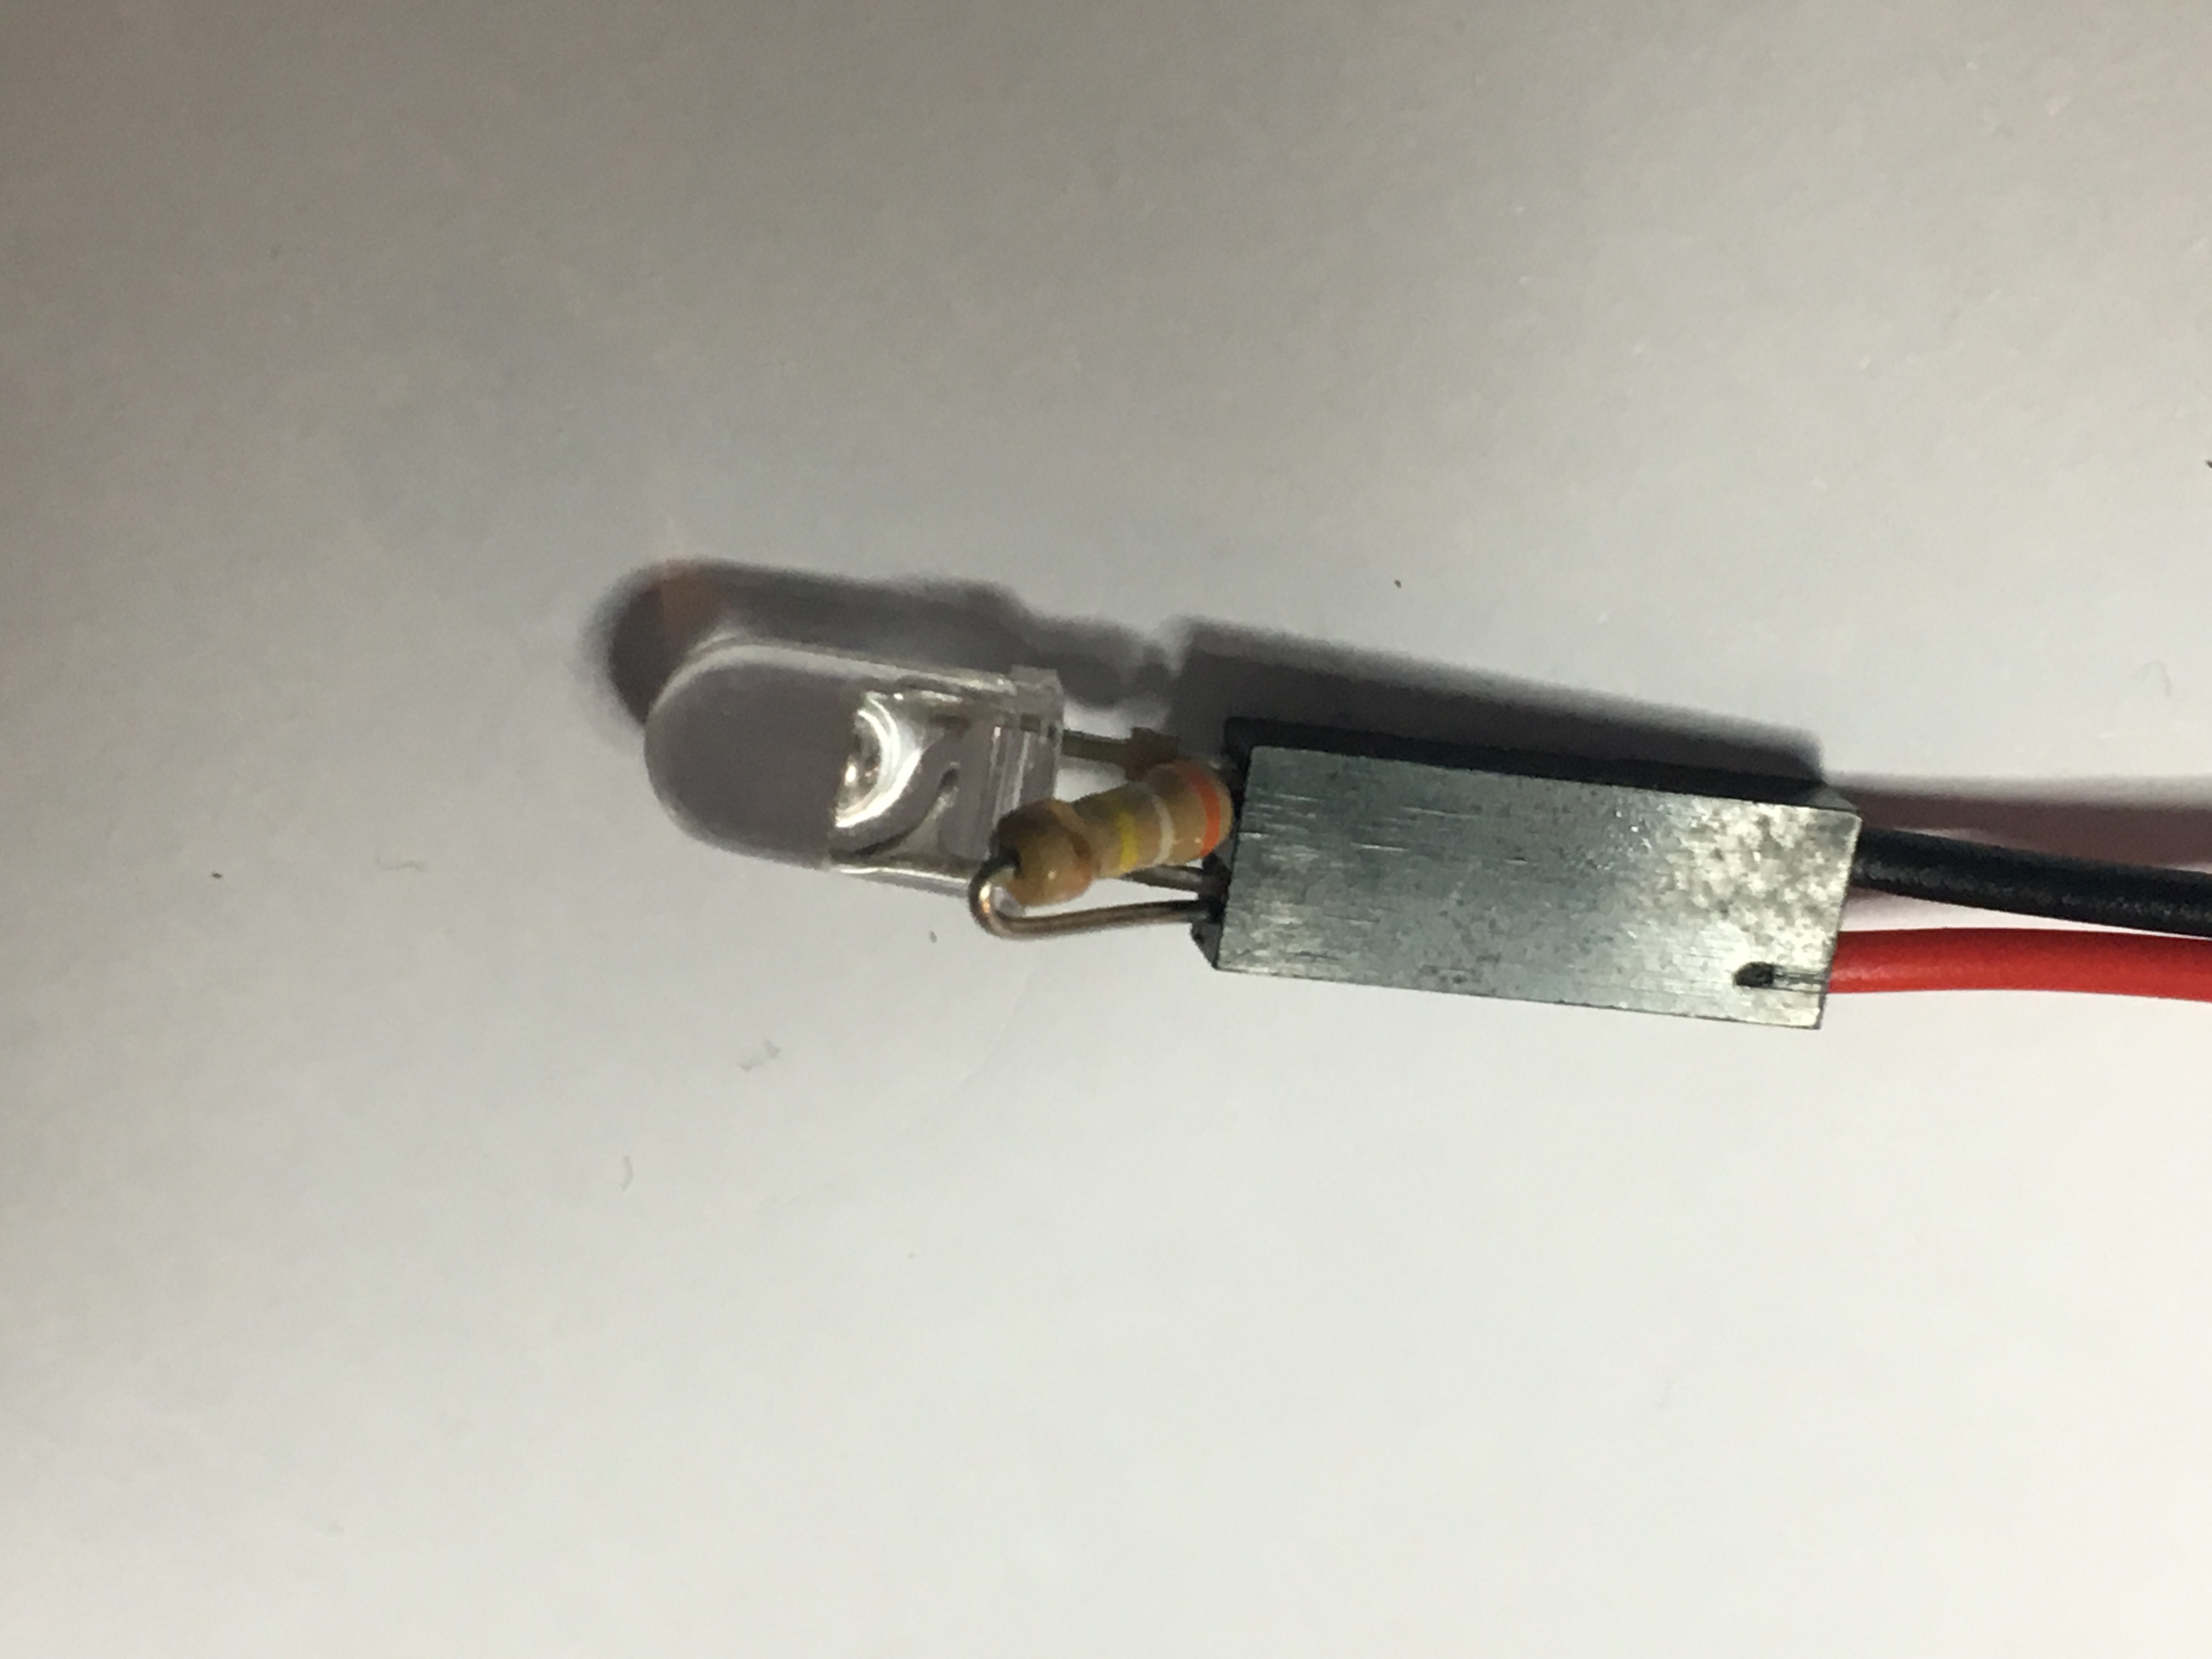 Slide both the phototransistor and resistor into the Dupoint connector.
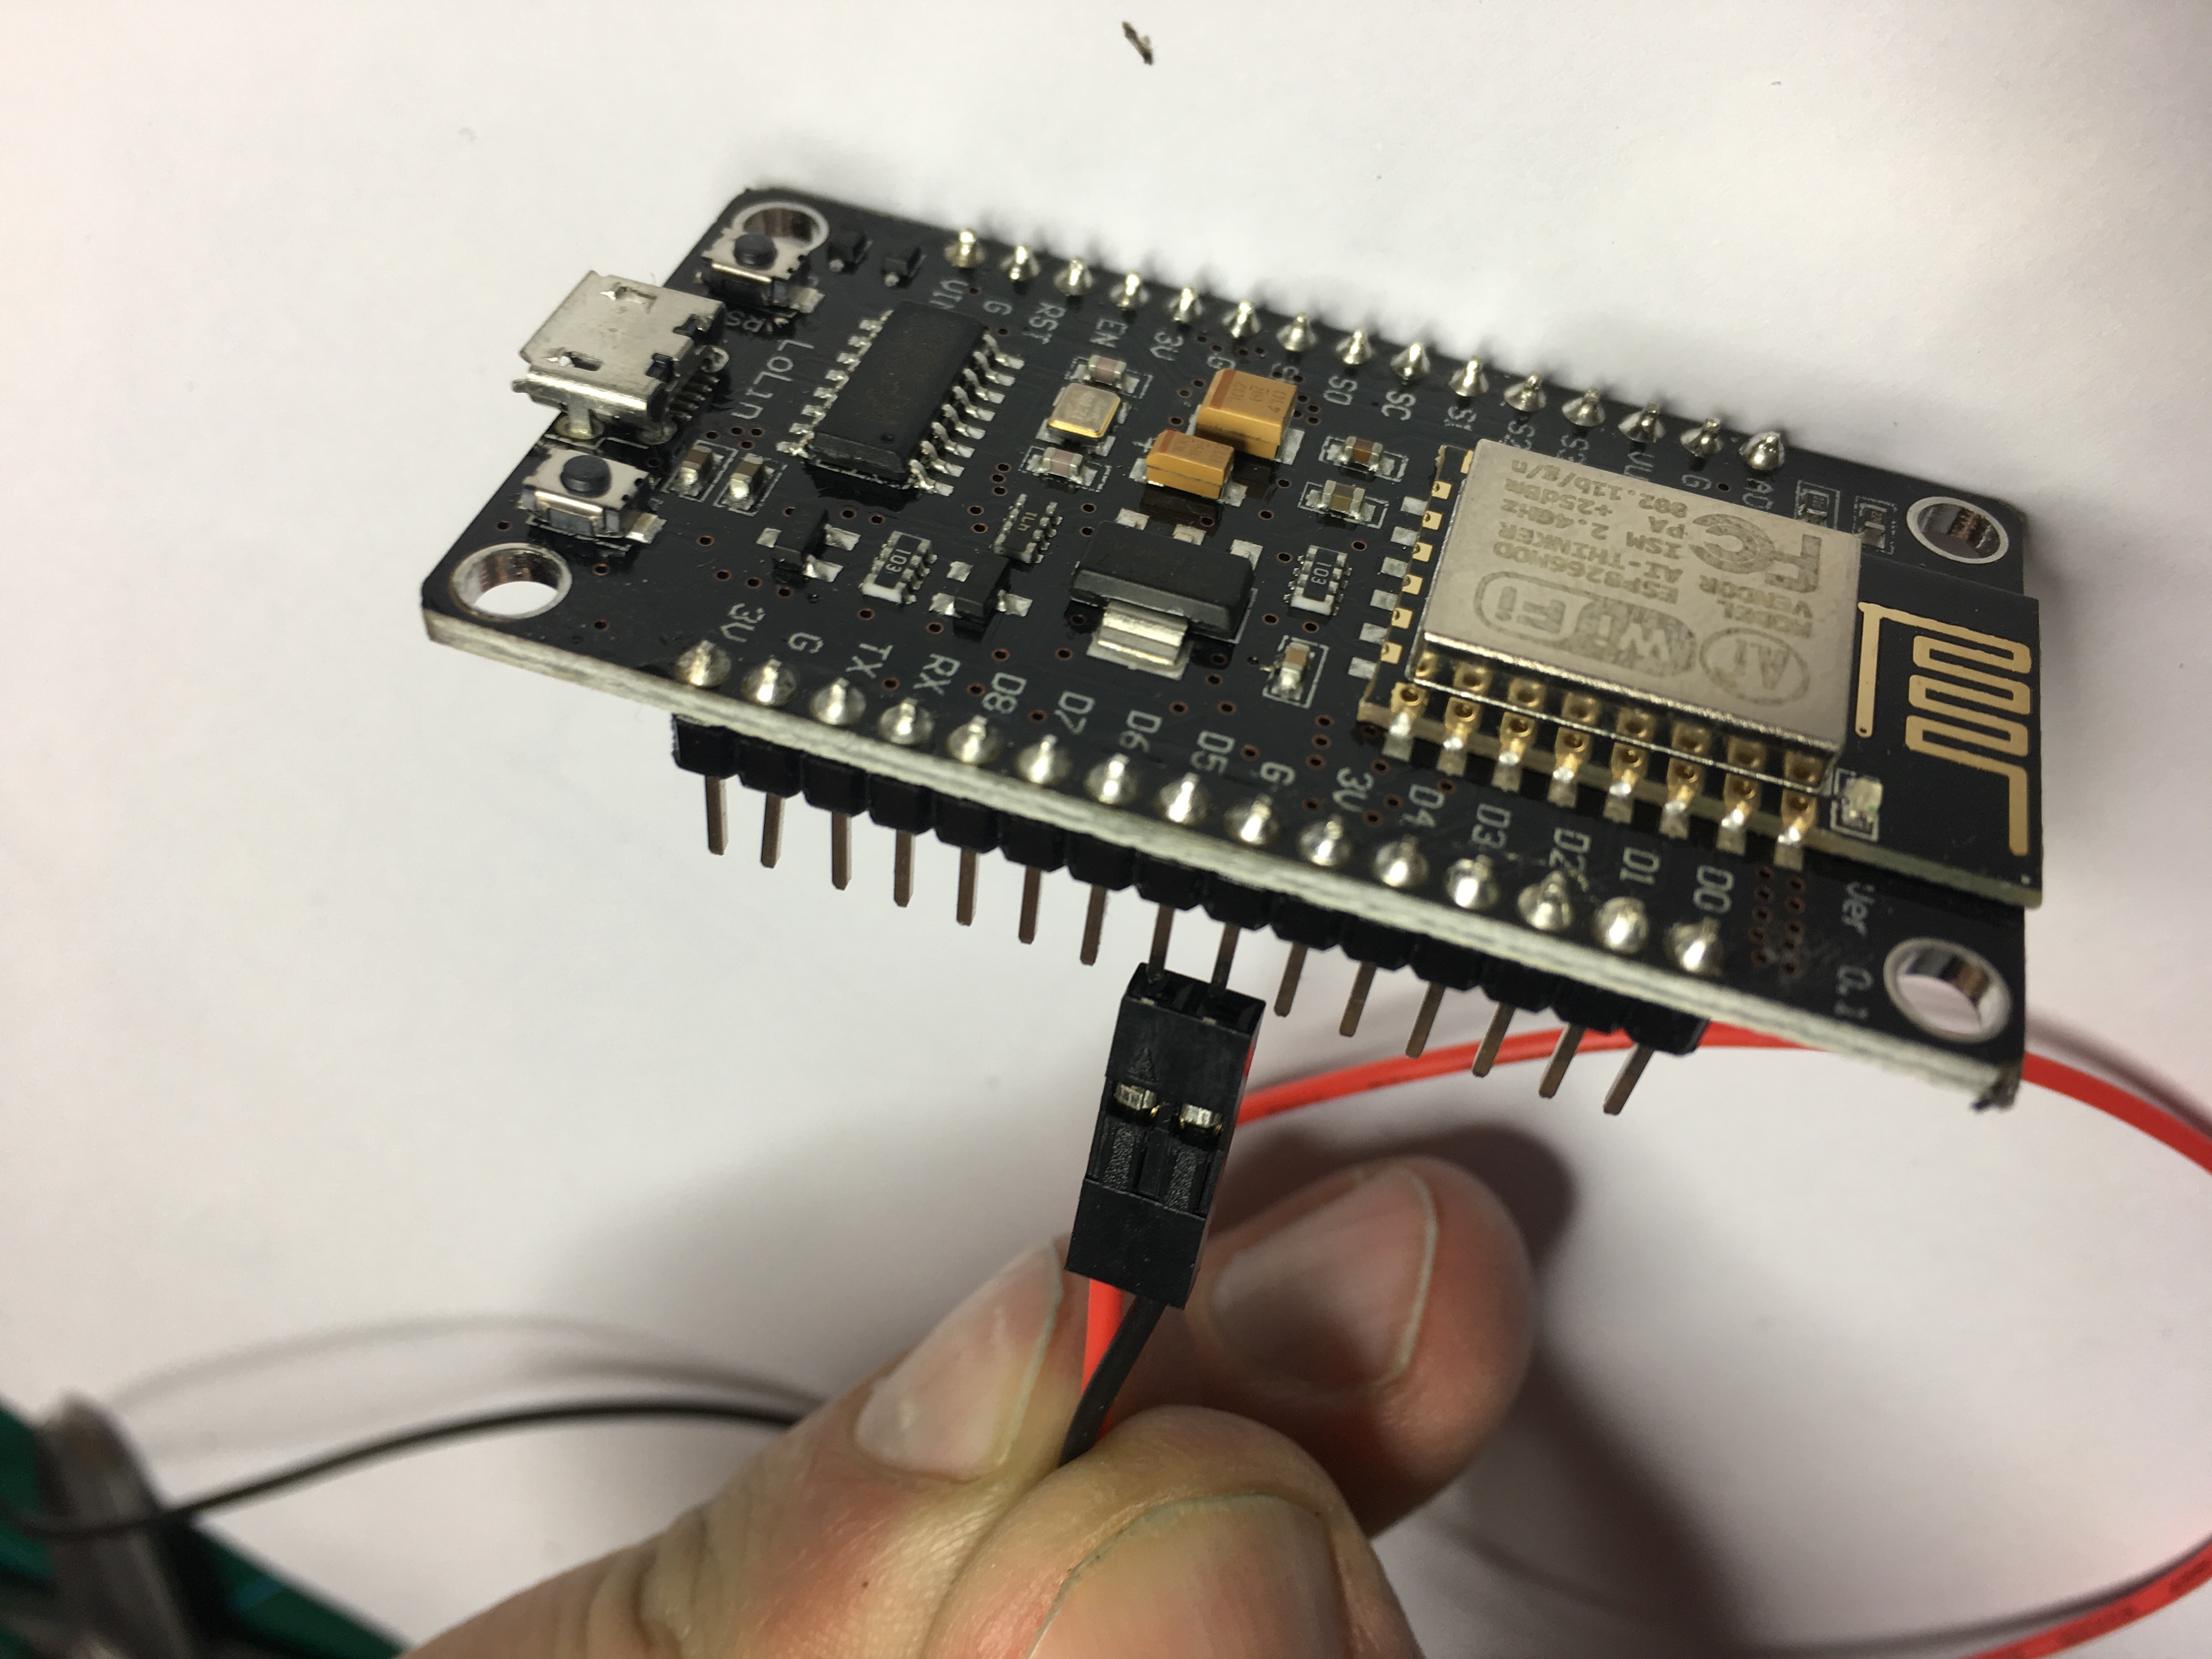
Connect the other side of the Dupont cable to the GND and GPIO5 (situated next to each other) on the NodeMCU. Make sure the phototransistor is turned the right way. The short leg with the broad stop piece and GPIO5 should be connected through the red cable and the long leg and GND to the black.
2. Mount the holder.
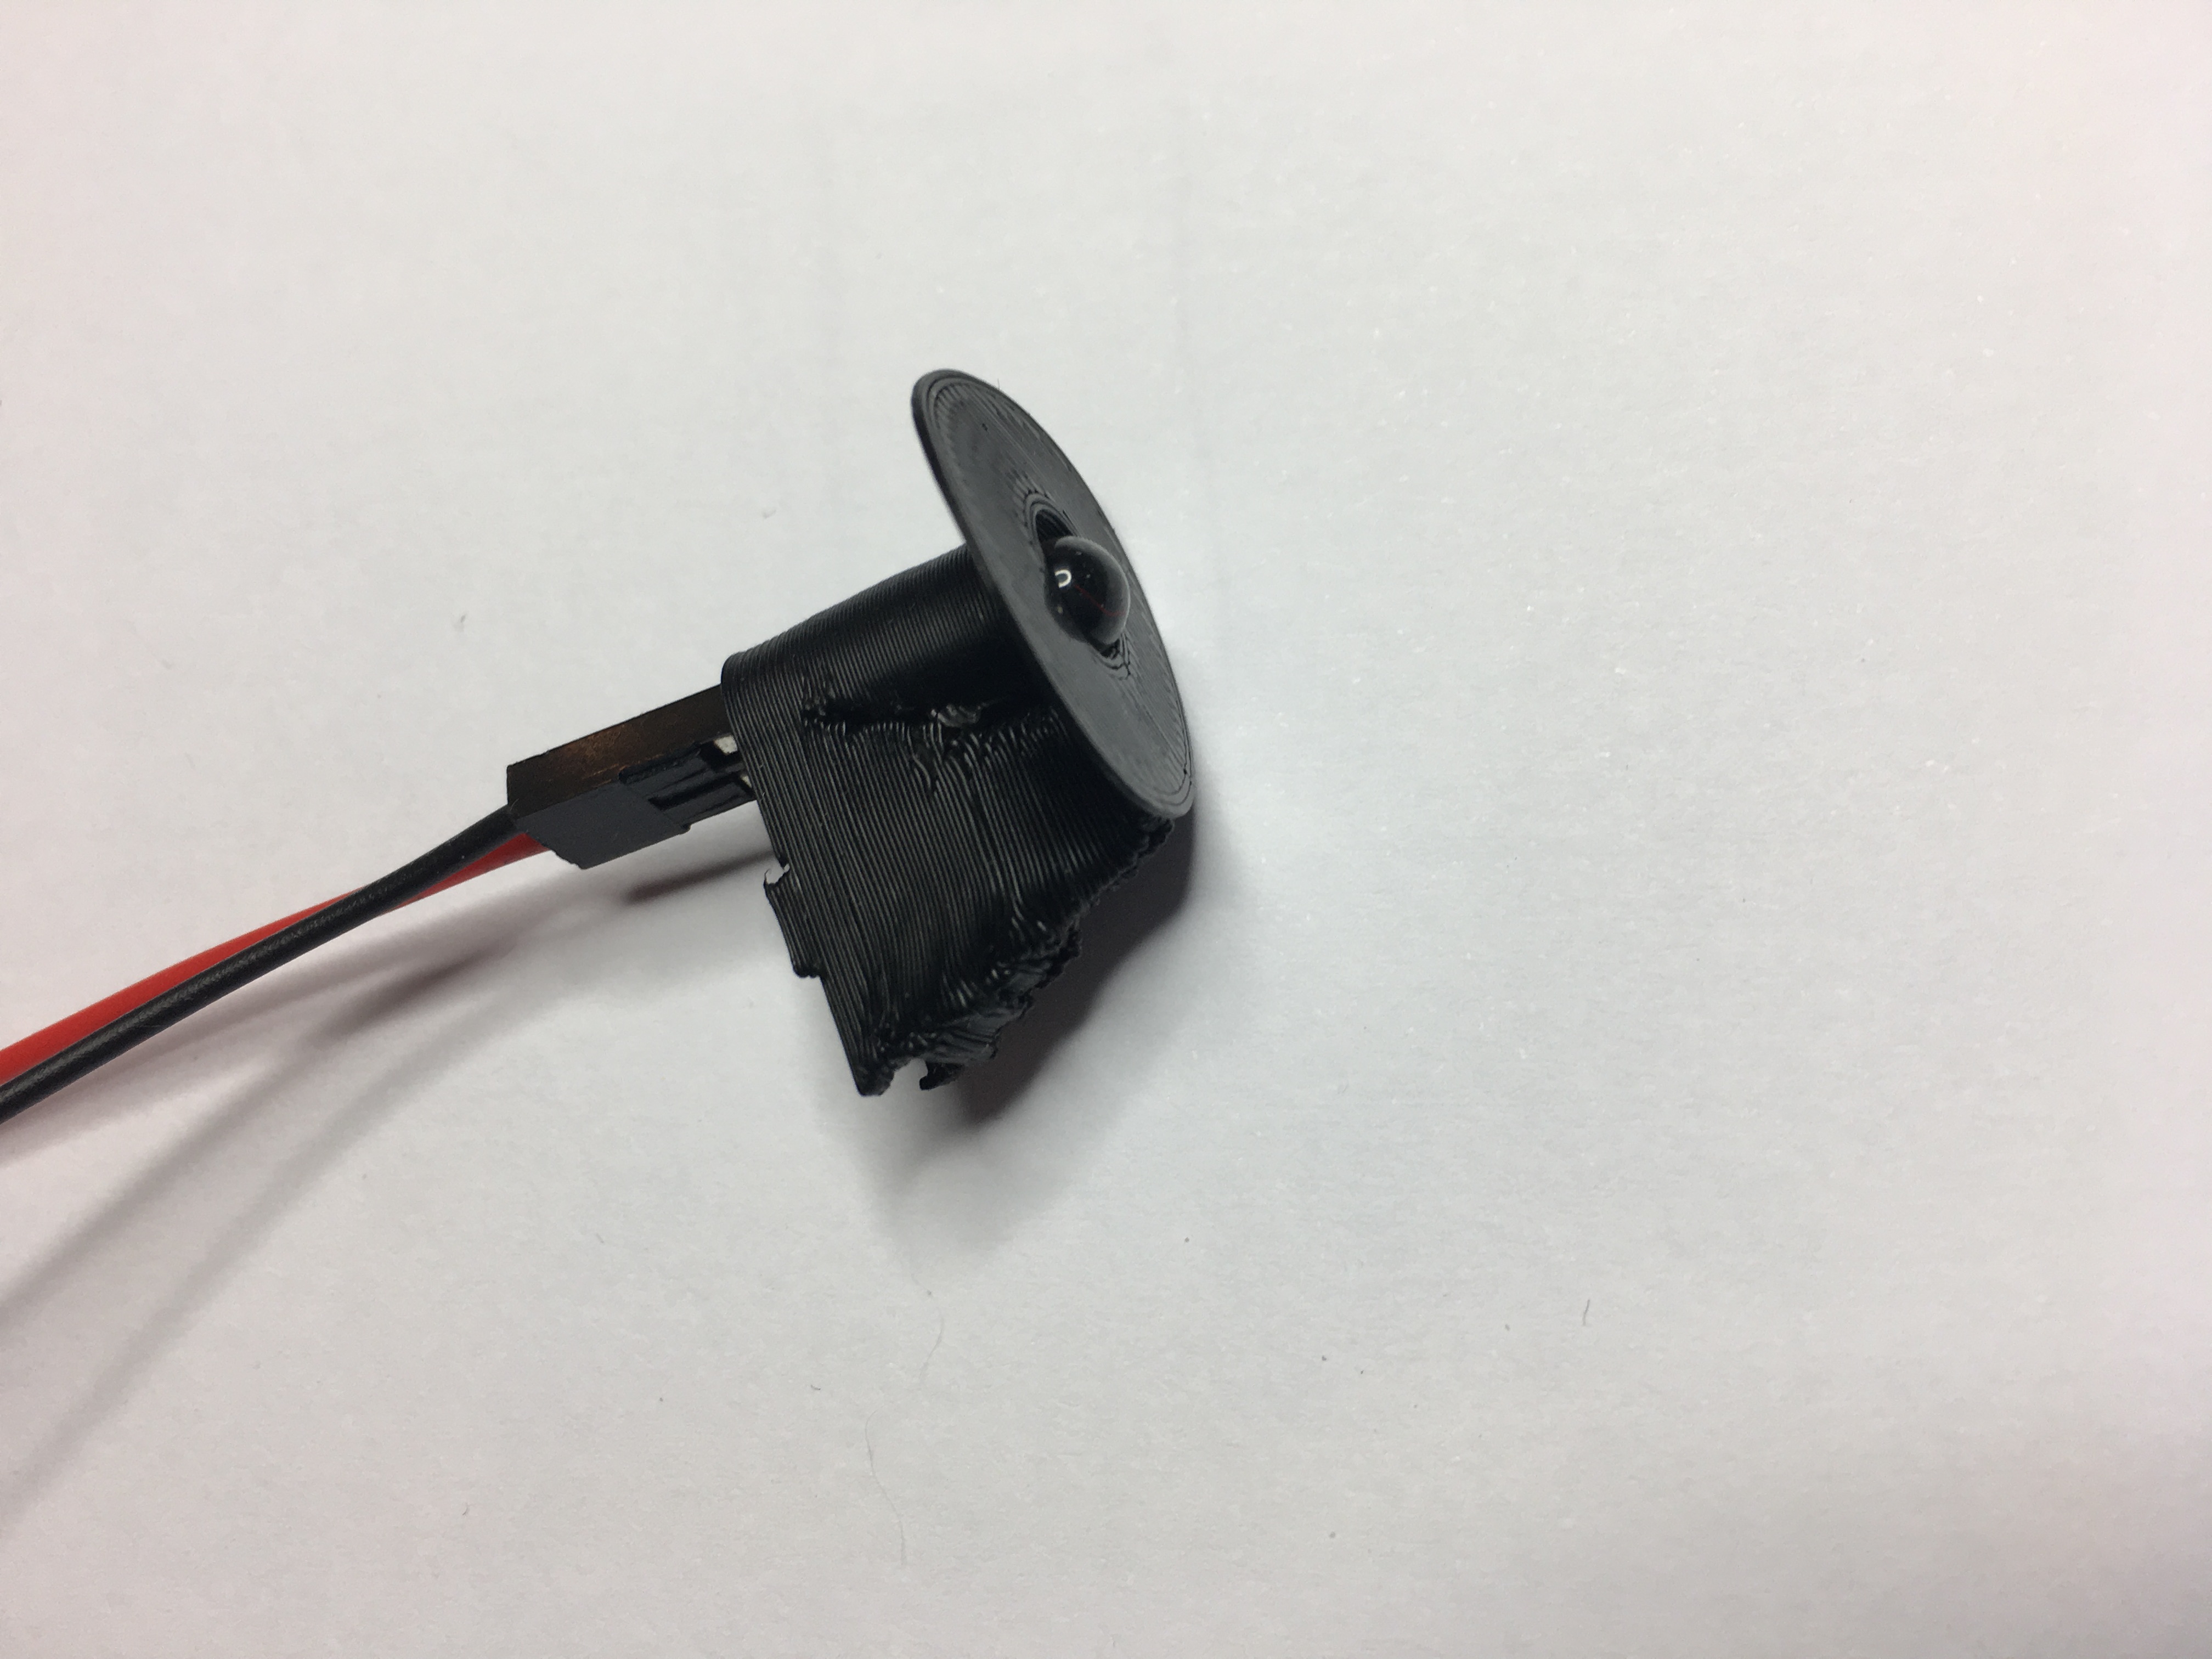 Push the phototransistor into the holder so that it sticks out 1-2 mm.
 Bend the Dupont housing down into the positioning the picture. If you have the resistor as well it can be left outside the holder pointing forward.
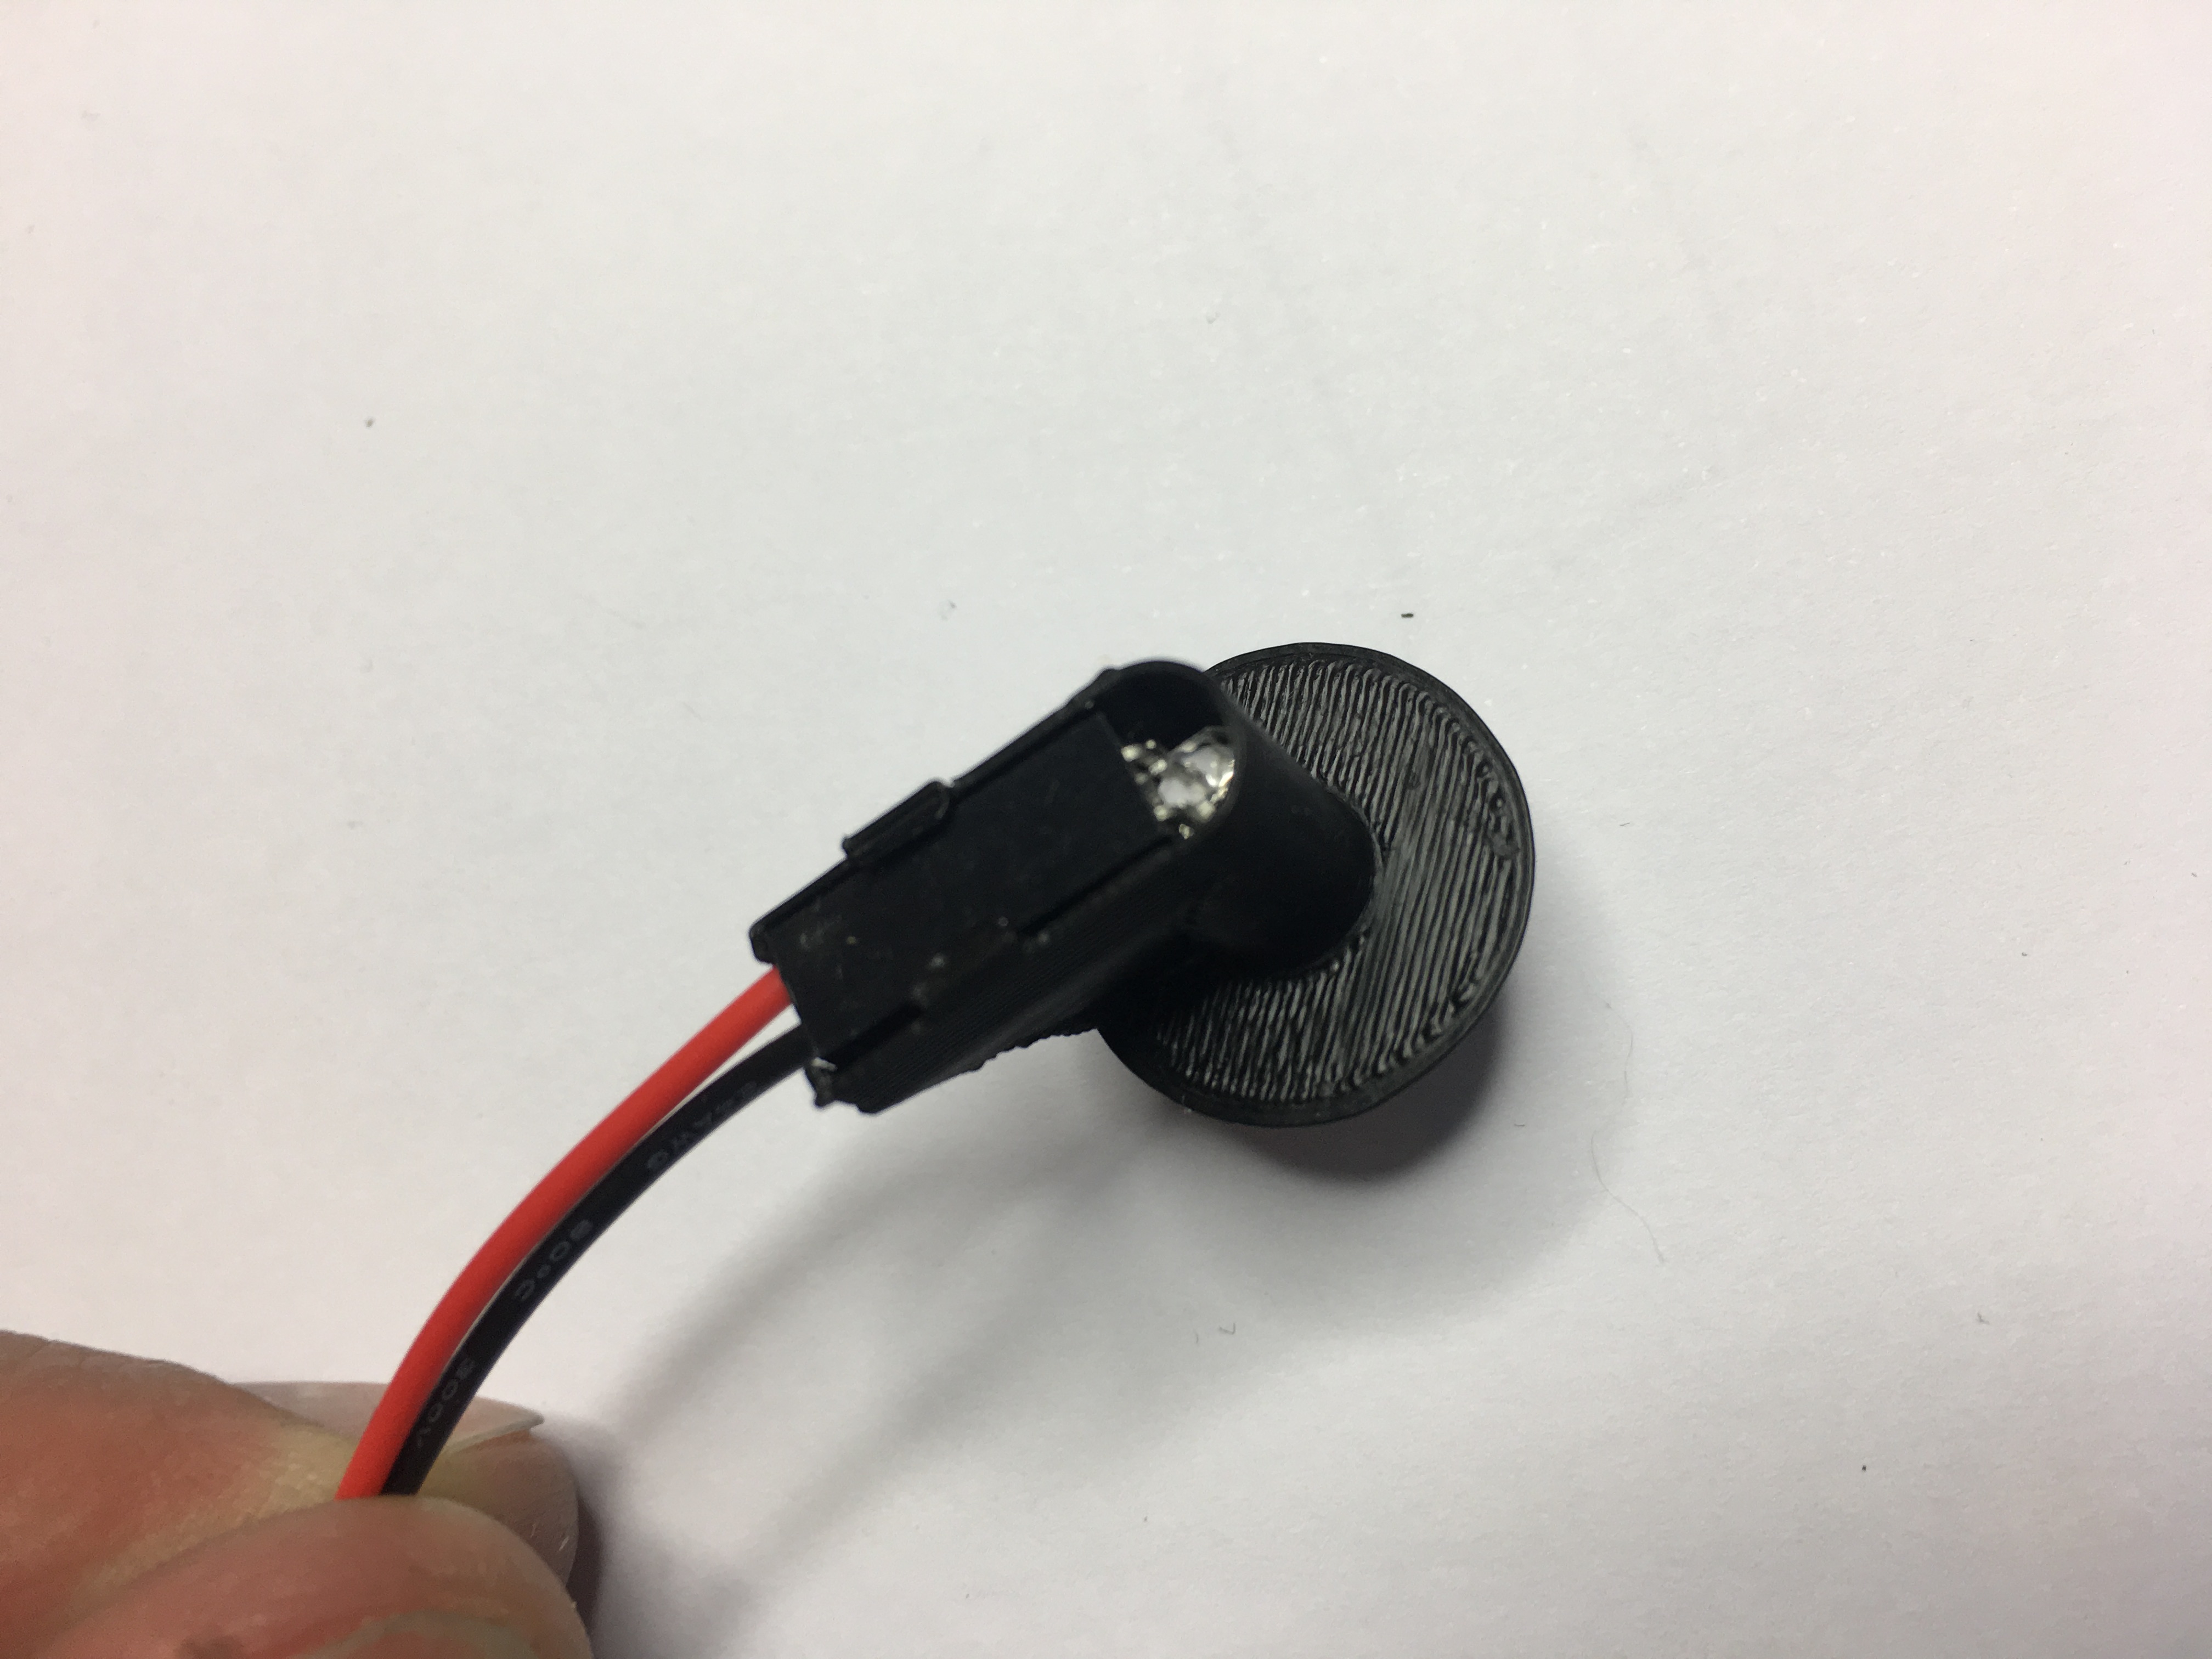
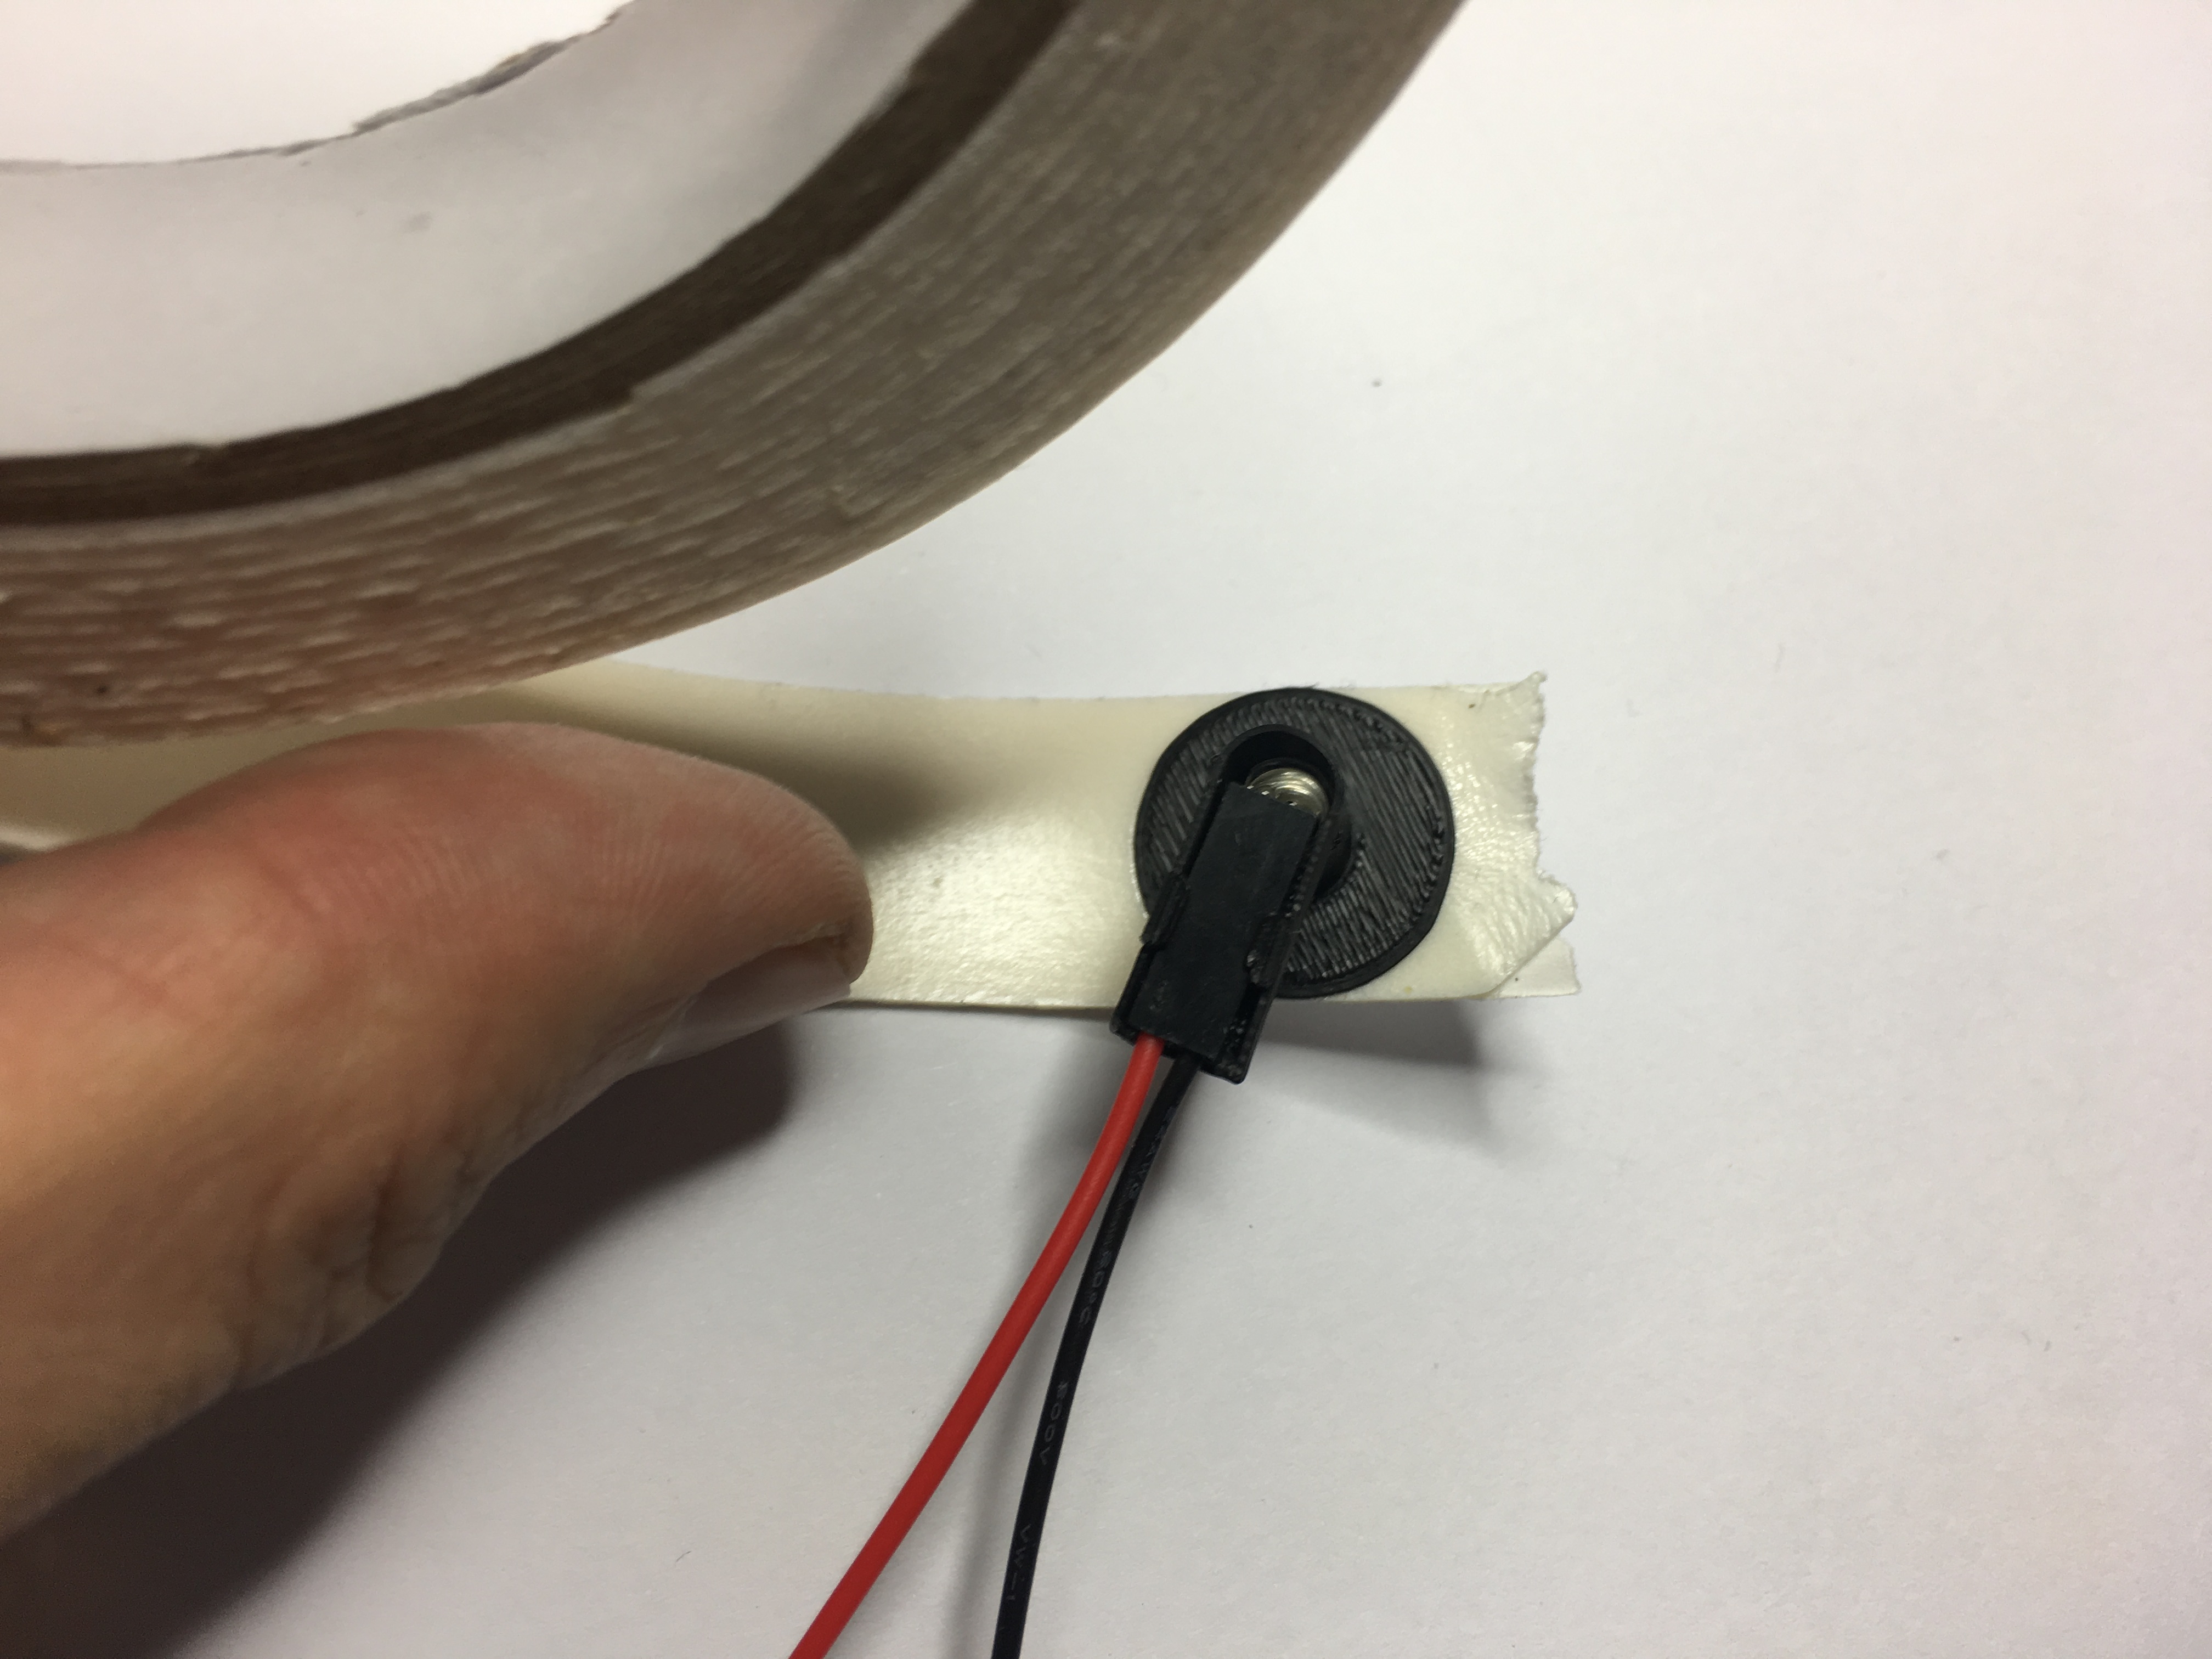 Cut out some double adhesive tape (the foam type works well) and stick it to the opening of the phototransistor holder.
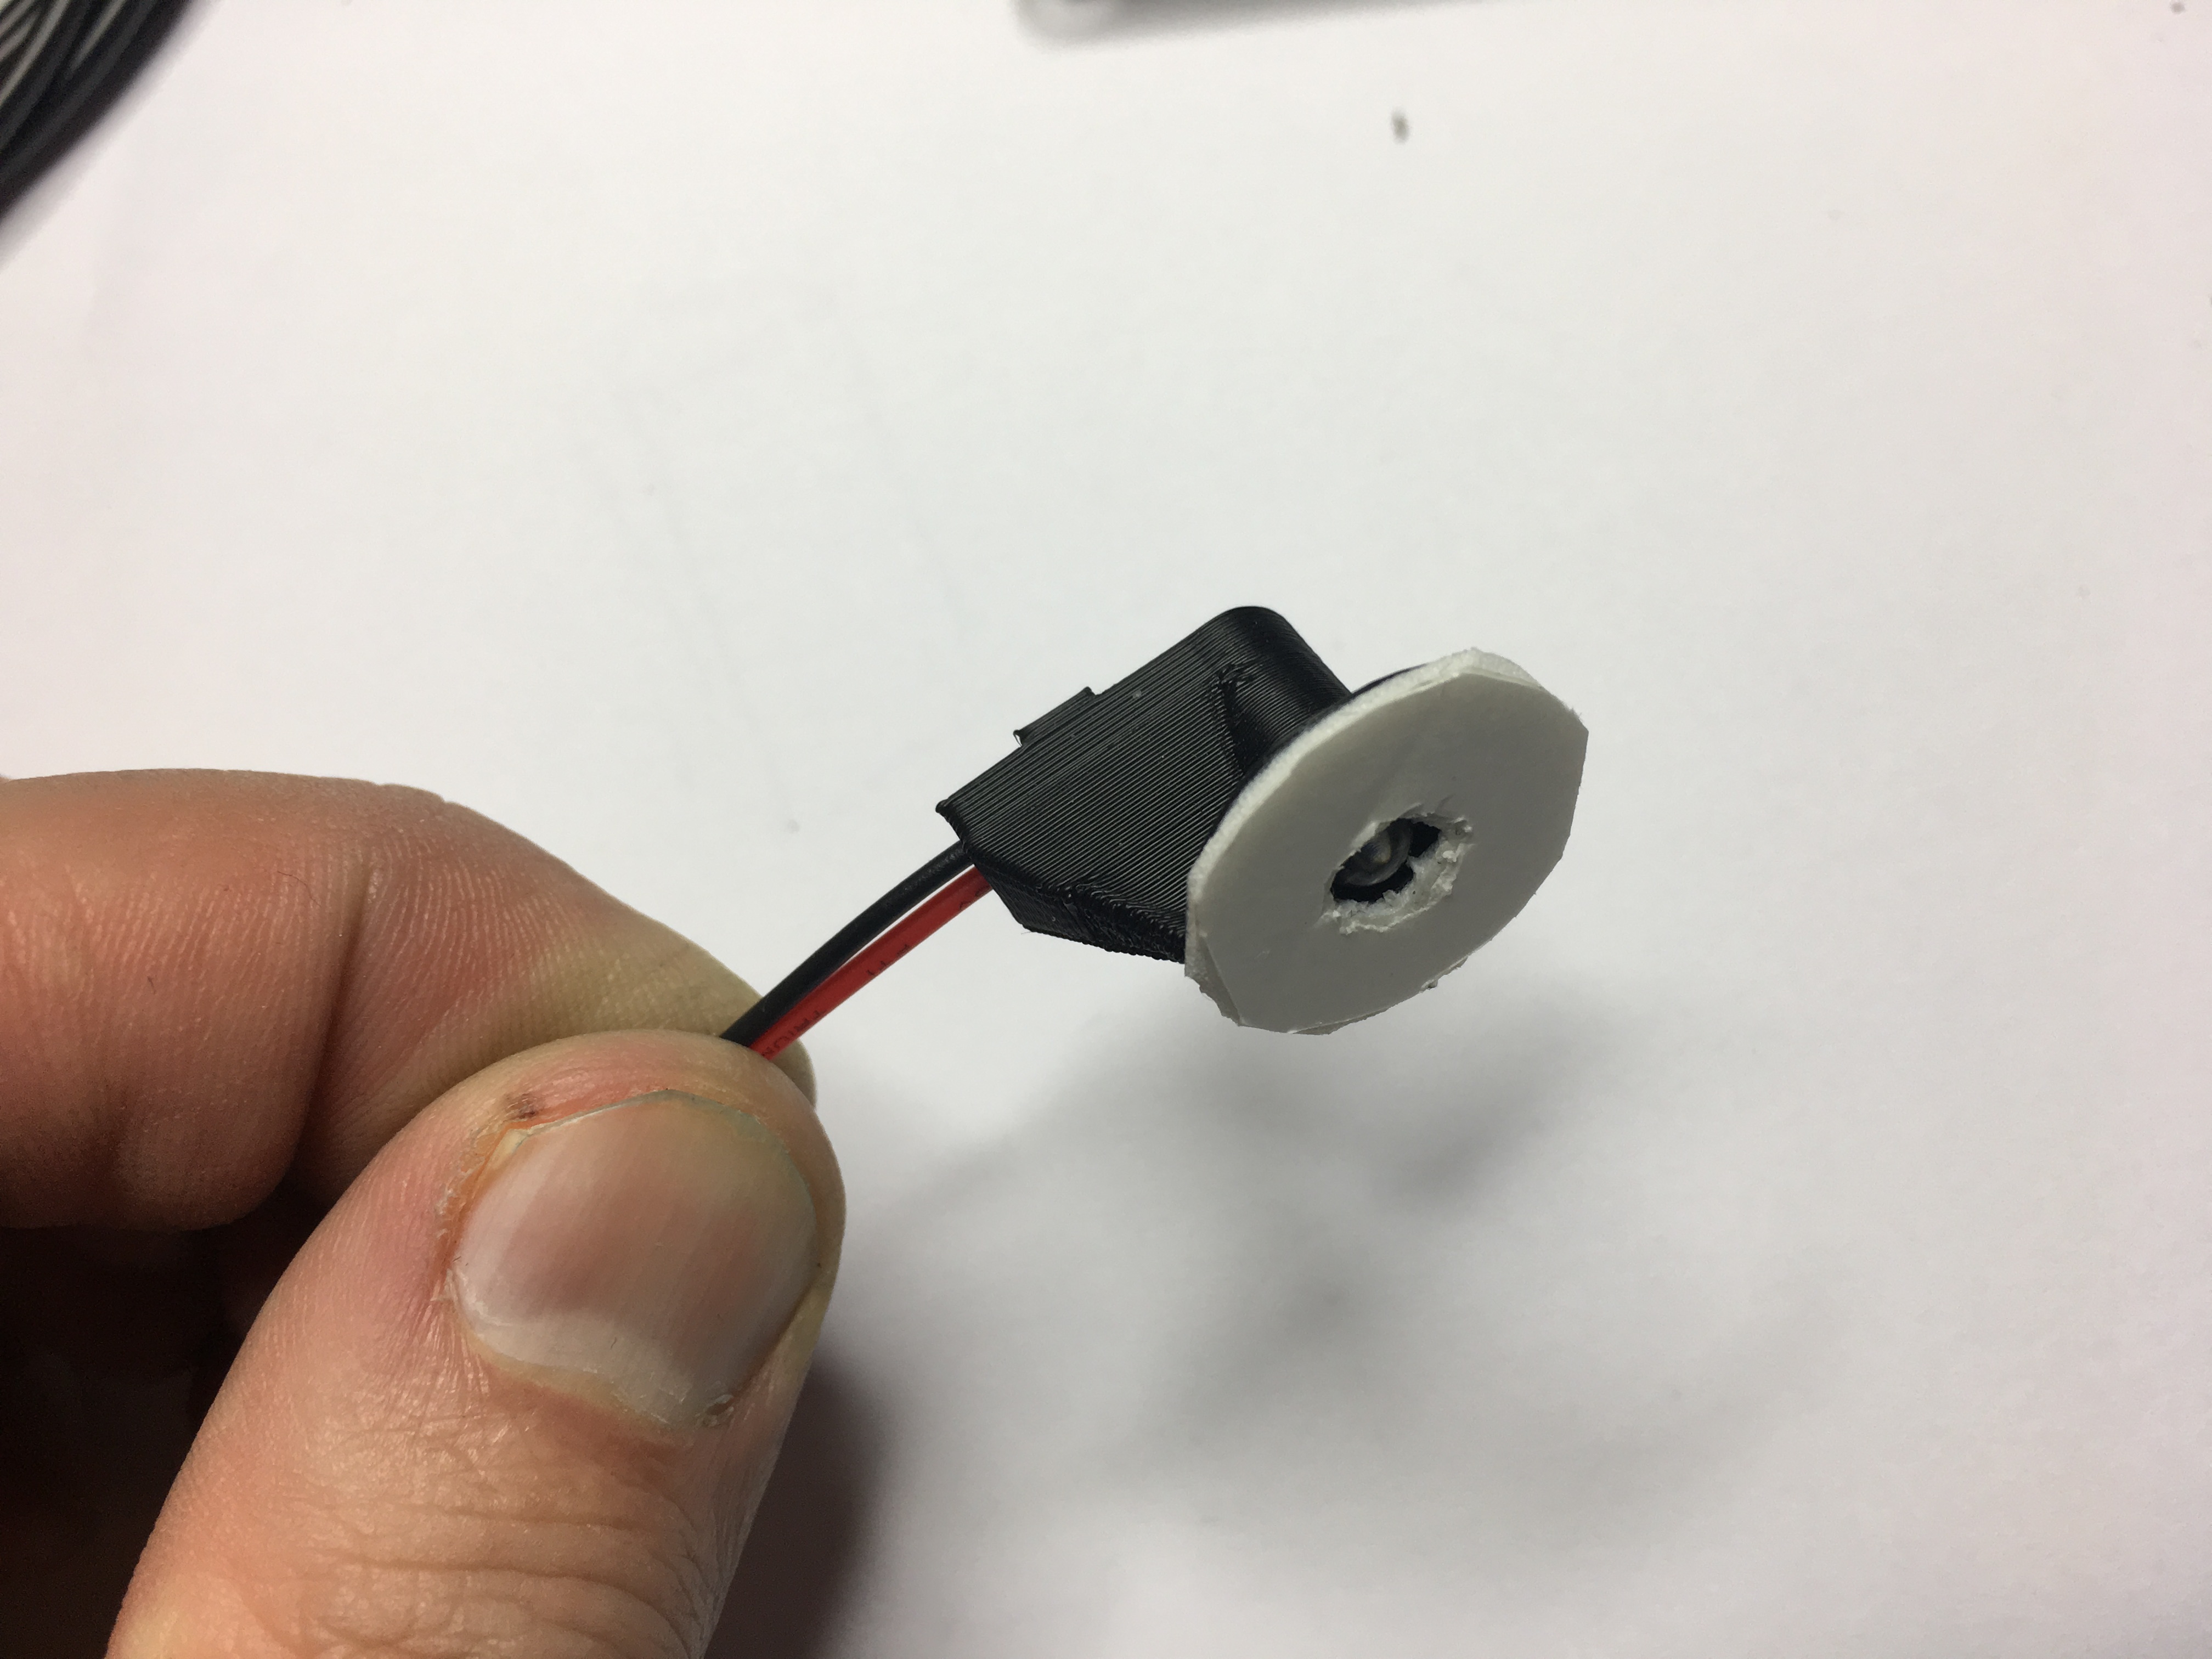 Make a hole for the phototransistor in the adhesive tape.
3. Installing the sensor
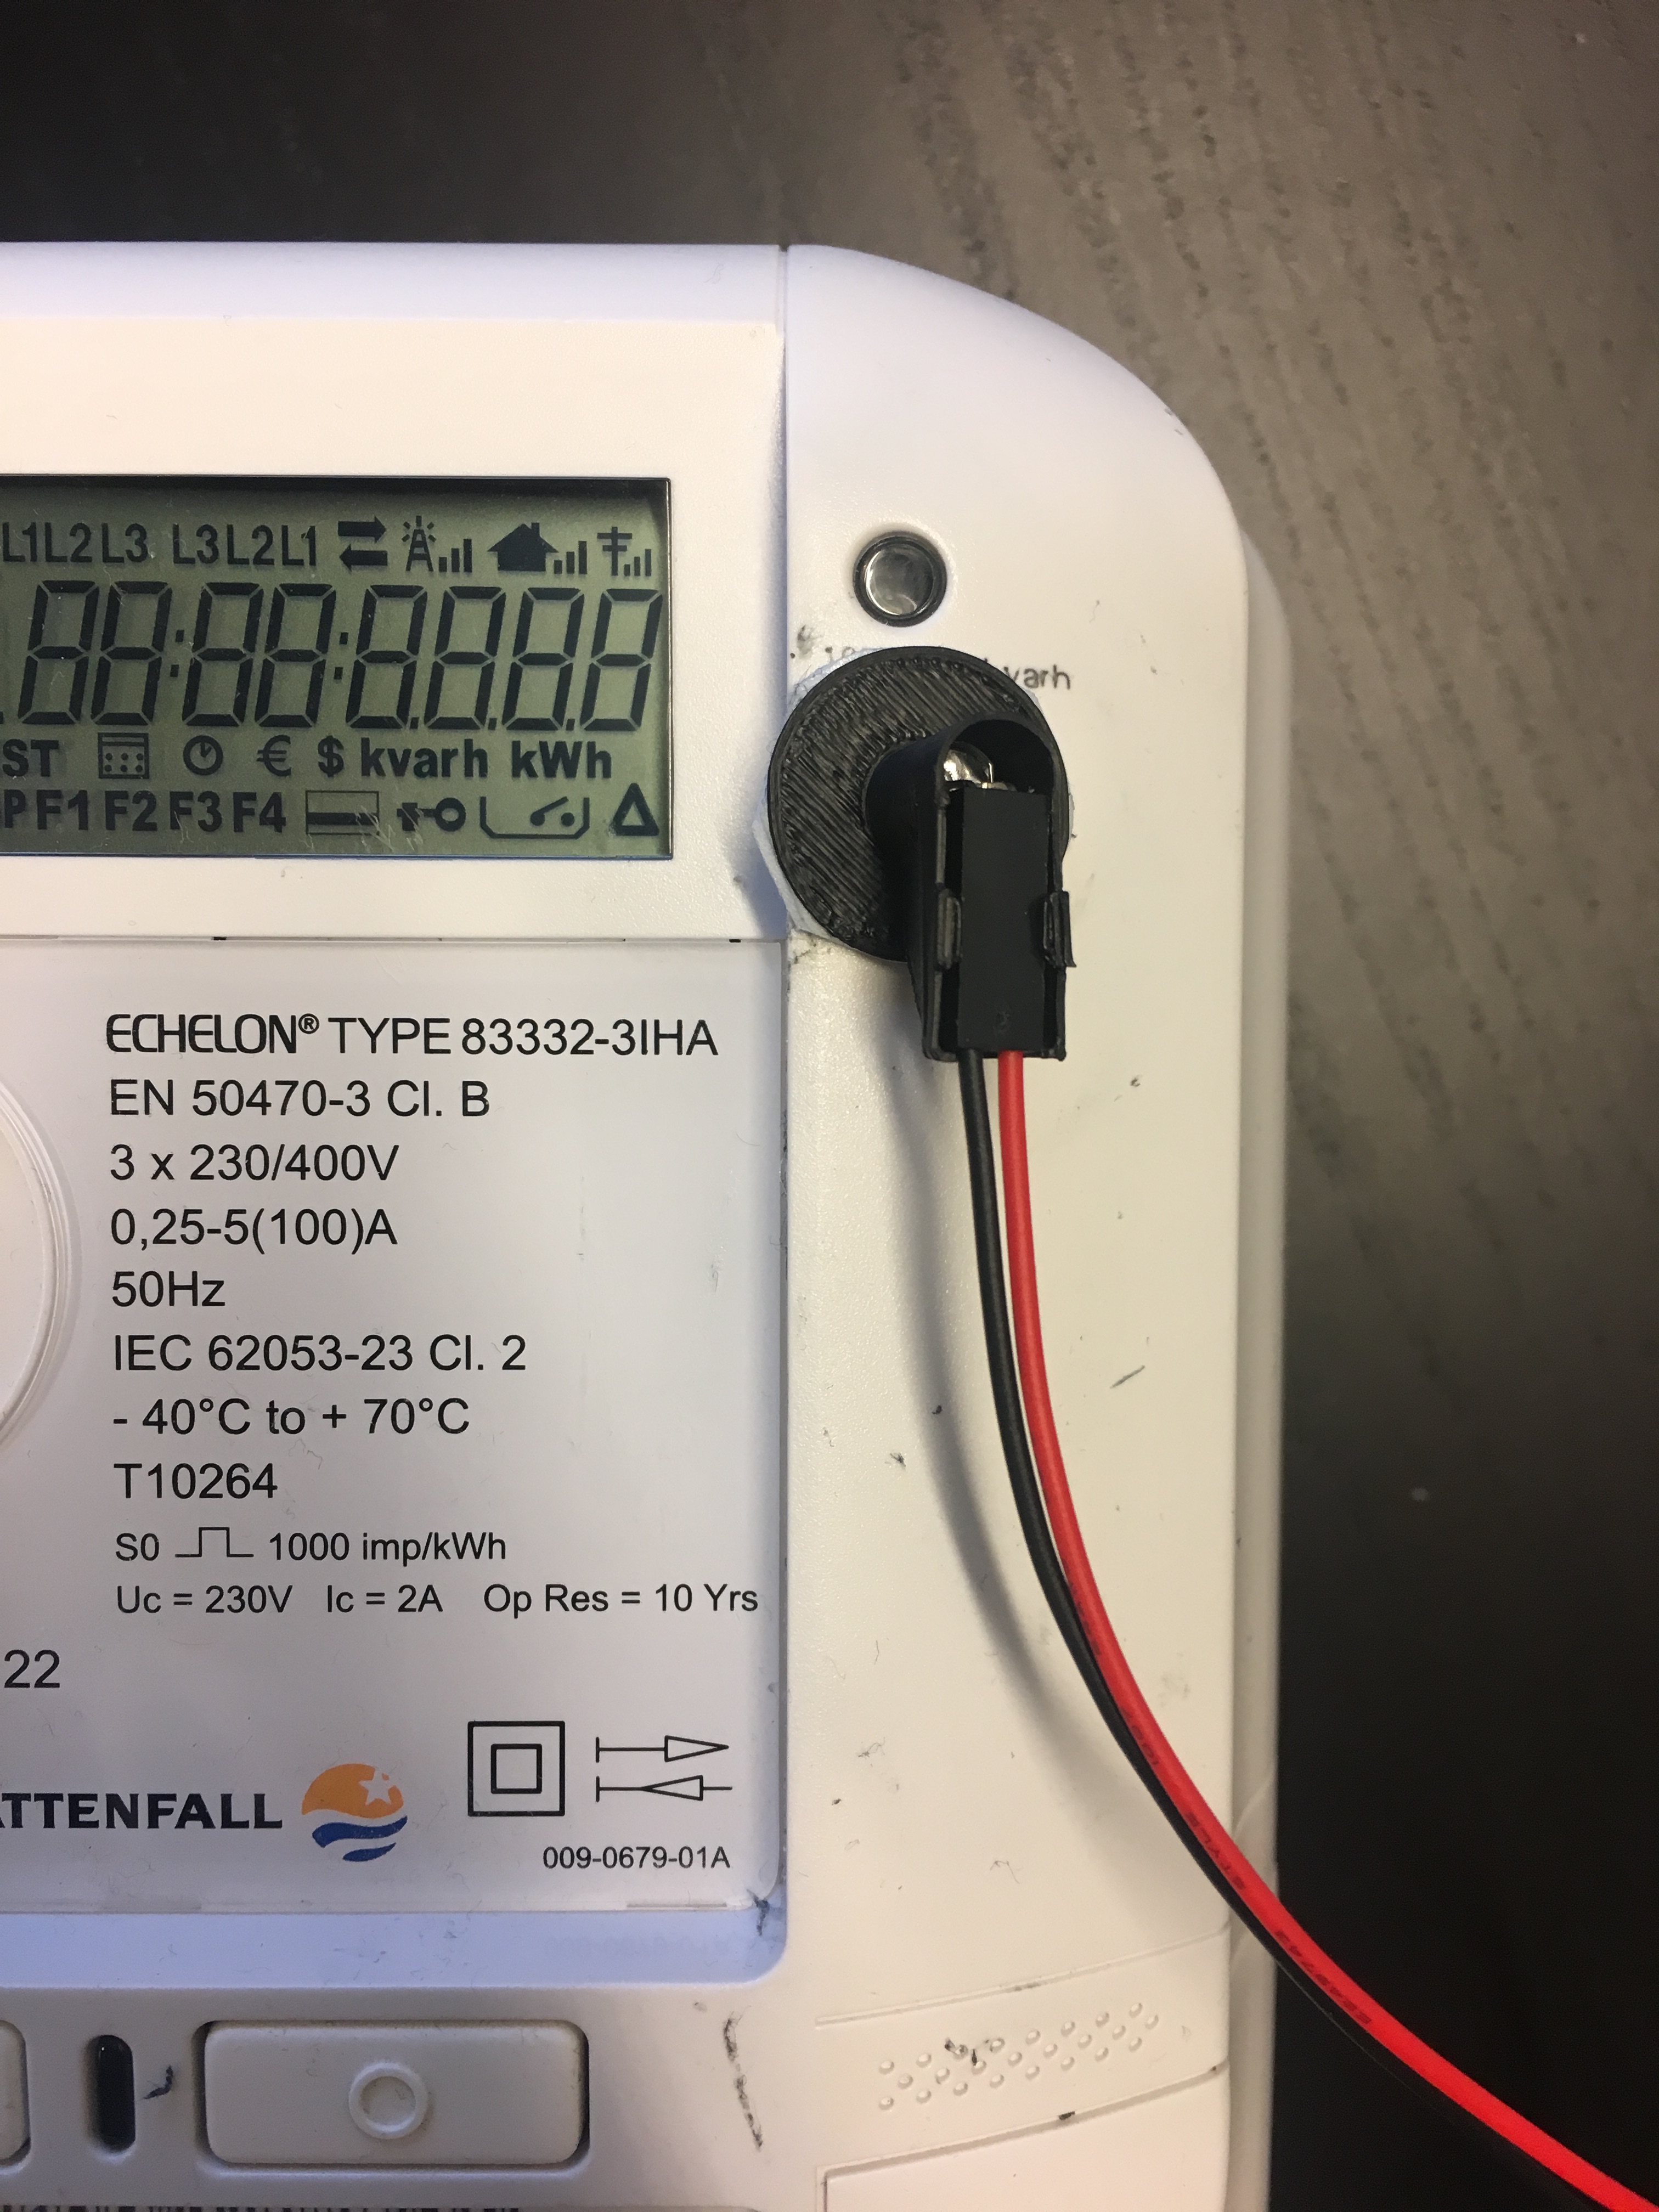 Your sensor is now ready to be used. To mount it you simply remove the protective plastic of the adhesive tape and stick onto the LED of on the electricity meter. You need to make sure the phototransistor is centred above the LED and that you have picked the right LED. Some meters have several LEDs. The right one usually have a marking saying "kWh" or "1000 imp/kWh", or something similar next to it. In the picture the top LED is providing pulses in the unit kvarh (reactive power) and the lower in kWh which is what we want. Before we mount the sensor however we will need to upload the software for counting the pulses onto the NodeMCU and check that everything works OK. Click the button below to go to the next section.